Introduction
Star trails photography is at the same time easy and rewarding, it can produce results that will leave most viewers in awe with very little effort.
I will try to cover in this article the basic photography technique and equipment needed for star trails photography.
Get away from the city
It is no secret that one should get away from the city to be able watch the stars, the same holds true for star photography.
Light pollution in the city is just to dense ! Head instead, for some remote camping siteor other unhabitated locations with a clear view for the sky.
Pick a starry night
Yea right ! I know it is obvious but still wanted to pin-point it! Also you might have a better visibility on a moonless night or when the moon is still low on the horizon.
What to Pack?
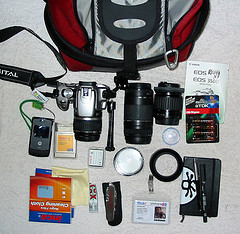
So let’s take a look at what you should take with you
- Camera: Don’t go without it
- Lens: You will need the fastest lens you have. Well pack 2 one long and one wide. I use a Canon EF 24-70mm f/2.8 (at 24mm) as my wide and an Canon EF 85mm f/1.8 as my long.
- A few memory cards: Star trails is the type of photography when you’d expect to shoot a lot of pictures and keep only a few so make sure to have enough storage with you
- A spare battery: Since we’re going to shoot long exposures you’d better have one or two freshly charged spare batteries with you. Specially that at night temperature goes down and batteries drain faster.
- Remote shutter release:If you don’t have one you can always use your camera’s timer.
- Camera cover: You’d probably need to protect your camera from dew and condensation.
- Tripod: This one should rarely be left behind.
- Flash light: Make sure to include on in you bag, you’ll need it not only to lighten you way.
- Warm clothes & gloves: They might come in handy if it gets too cold.
Camera settings
- ISO Settings: You will need to crack up your ISO settings at at least 800. Although it is very common to use ISO 1600 and 3200 for these shots it is a safe bet to start doing test at ISO 800 and check if there is a need to go higher
- Noise reduction: If your camera has a noise reduction feature make sure to turn it off or else you’ll end up waiting for your camera to finish processing unable to shoot between every 2 pictures.
- White Balance: Knowing that a star is a far away sun then, logically, the correctWhite Balance should be daylight. However this WB setting will generally lead to a very odd sky color, I’ve had much better results using Tungsten white balance.
- Mirror lockup: To minimize camera movements to the max you will want to enable the mirror lockup and, if you don’t have a cable release, enable the timer on your camera.
- Shoot Raw: RAW is much more flexible in editing afterward and specially effective for tweaking white balance settings.
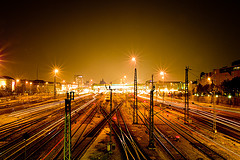
Go wide and include a foreground
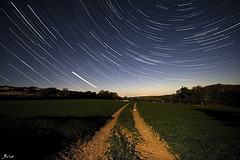
It is interesting to include an building/tree/rock or any other object or scene in the foreground. It gives a sense of familiarity to the viewer as seeing a normal scene in an incredible way.
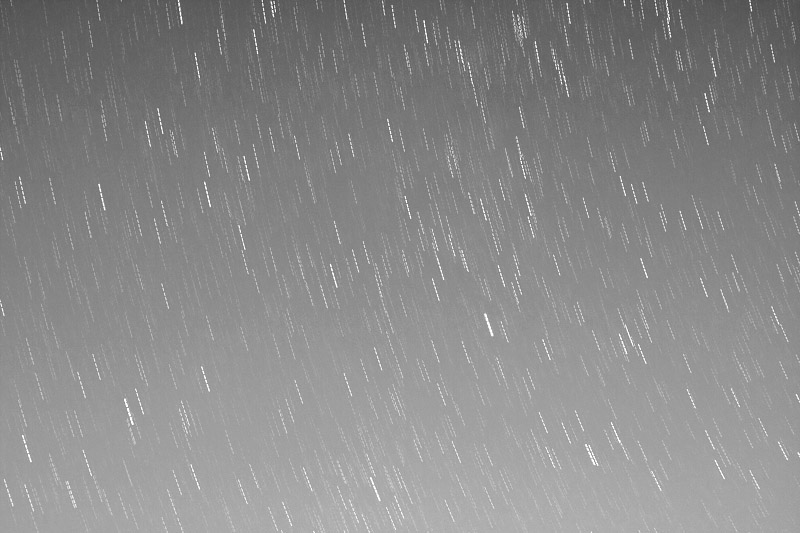
Go long for abstract effect

Another option would be to compose your shot to include only stars. This will lead for a more abstract effect.
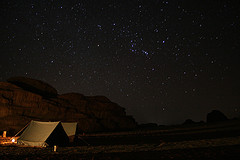
Get Creative with light

If you chose to go for a wide angle shot you can also use the flashlight to “light paint” the foreground. This will lead to have a nice foreground with details instead of only a black form.
Taking the shot
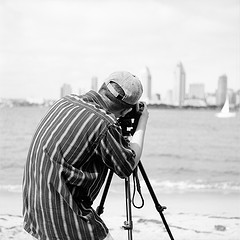
- Secure you’re camera on the tripod
- Pick your composition
- Set your Camera to manual exposure and RAW
- Set ISO speed 800, Aperture to the widest possible and shutter speed to 30 second
- Enable mirror lockup
- Don’t forget your white balance
- Put your lens on Manual focus. If you have live view focus in that mode if not simply set your lens to focus at infinity.Be careful most lenses can focus past infinity you have to be sure focus is at infinity.
- Put your remote release to continuous shooting mode, this will lead your camera to take repetitively shots of 30 seconds each keep noise minimal
- If you don’t have a remote release, simply press the shutter button gently every 30 seconds and make sure you have your camera set to 2 seconds timer not 10 seconds
- Keep warm and enjoy your night. Don’t forget to give light painting a try!
What about processing your images into one shot?
ReplyDelete