In this tutorial, we'll take an in-depth look at restoring an old torn photograph. Restoring old family photos is something that you can do for your relatives and bring tears to their eyes, and yes this is a service you can offer to clients as well. Let's take a look at a professional workflow for restoring old photographs to their former glory.
Final Image Preview
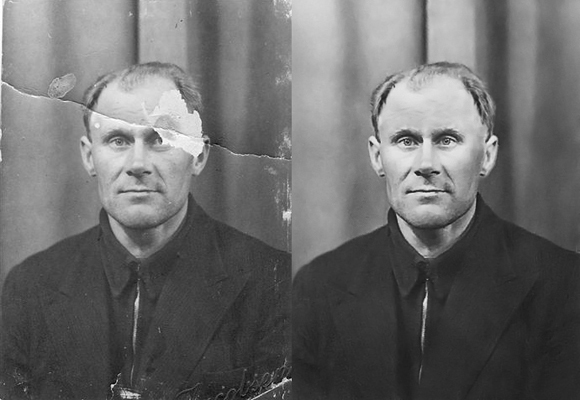
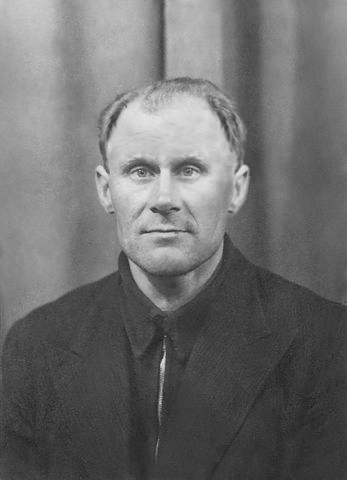
Before we get started, let's take a look at the image we'll be creating. Want access to full PSD files and downloadable copies of every tutorial, including this one? Join PSDTUTS PLUS for just $9/month.
Introduction
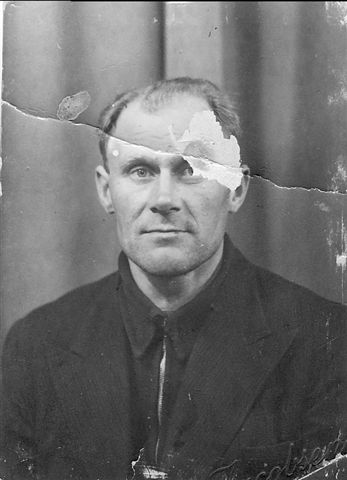
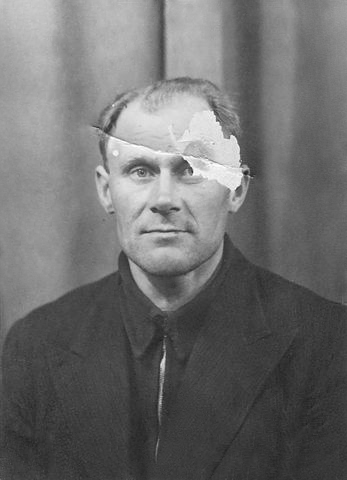
When deciding on which picture to use for this tutorial, I encountered the lack of material I could use in public. The picture provided is a family photo sent to me in a terrible scan resolution. But the picture was just the kind of picture I found right for this kind of tutorial. And the end result also shows that you actually can work on poor scanned pictures and get reasonably good results.
The print size is of course limited due to this. That said. The importance with this tutorial is guiding you through the workflow process. There are some important steps, however, you must keep in mind, but never hesitate to be creative and explore different approaches. The steps to follow are:
- Make a copy of the original to work from
- Adjust the dimension you need and crop the image so you don't work on areas you don't need.
- Retouch/restore areas in the image as needed.
- Remove noise or unwanted patterns
- Adjust highlights shadows and neutrals (in color photos you would also adjust skin color)
- Adjust the brightness and contrast
- Sharpen
Step 1
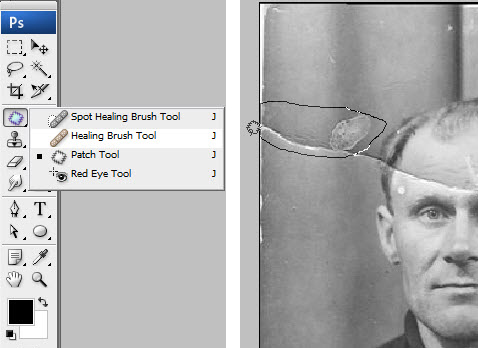
And now for the workflow and tutorial. In Step 1 I have already specified dimensions and cropped the image. You would then go about the restoration. I always start out in photos like this with the patch tool and get larger areas roughly patched. Then I get more specific and change between the Patch Tool, the Healing Tool, and the Clone Tool as suited. I'll explain in more detail in the next steps.
Step 2
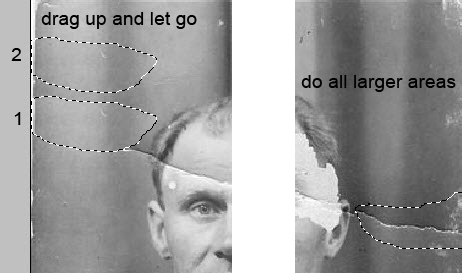
The Patch Tool works just as the Marquee Tool in regards to behavior. You drag a selection around the area you want to fix, then you click in the middle of your selection, and whilst holding the mouse button down, you drag the selection to another location in the picture with similarities and let go. Be sure to align your selection before you let it go. See next step and watch the alignment.
Step 3
Watch alignment in the shades of the curtain in the background. Do all larger areas in the picture. This tool not only works great, but it's also a timesaver and a good way to start your restoration.
Step 4
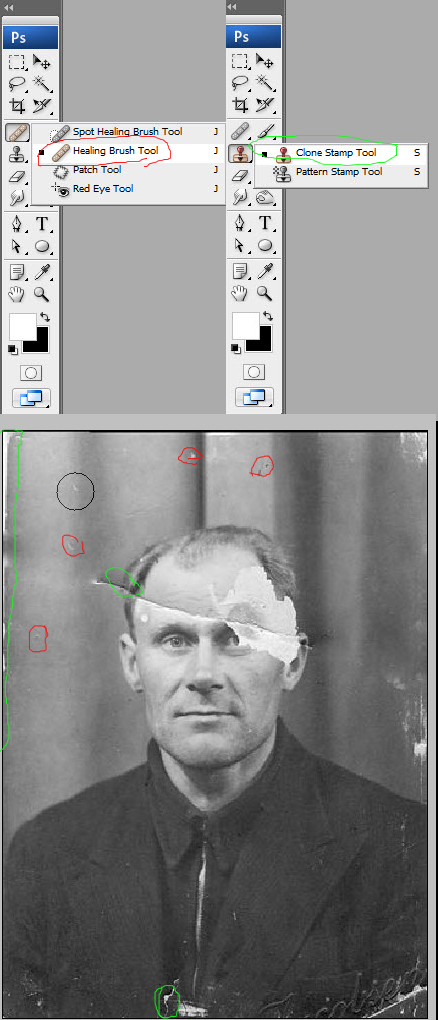
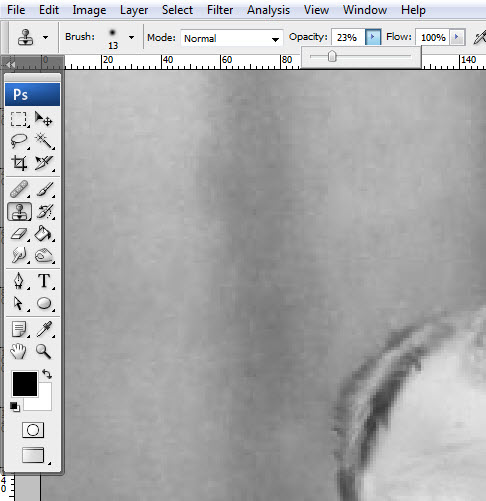
After getting all the larger areas done change to the Healing Brush Tool (see corresponding red color in the picture below) and Clone Stamp Tool. As you work on your picture always feel free to experiment with these tools. If you are concerned with an efficient workflow, it's good to get the grasp of these three tools.
Note that the Spot Healing Tool is also a tool you would use where, as its name suggests, there are spots. It works by just clicking on the spots you want to remove and I find myself using this often in some pictures where there are spots scattered around in the image. The workflow would then be to start out with the Spot Healing Brush, then changing between this and the Healing Brush Tool. In this picture, I had no need for it though.
As the picture below suggest, I use the Clone Stamp Tool at the edges of the picture. The Healing Brush Tool and the Patch Tool will usually create some effects you don't want when you work towards the edges of a picture. Just try it out and you'll see what I mean. Again, just change between the tools and feel free to experiment between them until you get your desired result.
Step 5
Here we have done the first part of the restoration.
Step 6
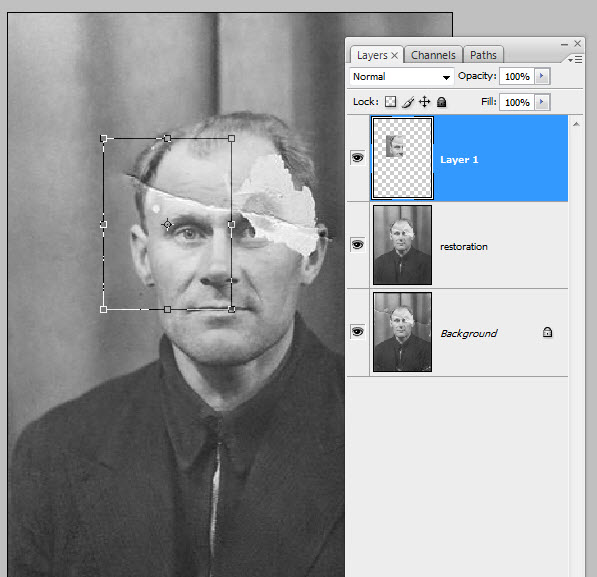
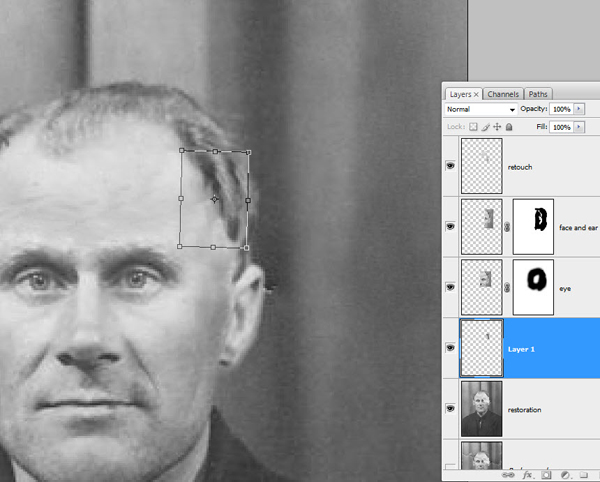
And now for the serious defections in our picture. Here we’ll use the man’s right eye to substitute his missing left eye. Just draw a rough marquee selection around his right eye, and then hit Command + J to jump the layer (copy the selection to a new layer).
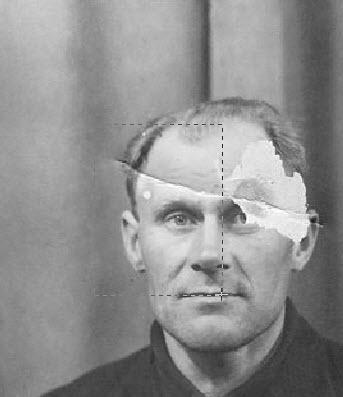
Step 7
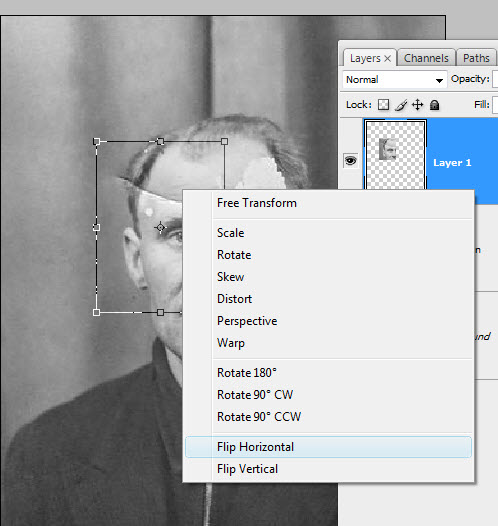
Then hit Command + T to enter the Free Transform Tool.
Step 8
Right-click inside the selection and hit Flip Horizontal.
Step 9
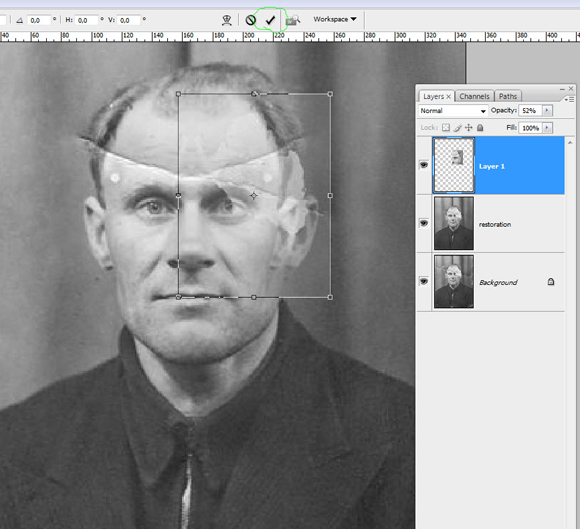
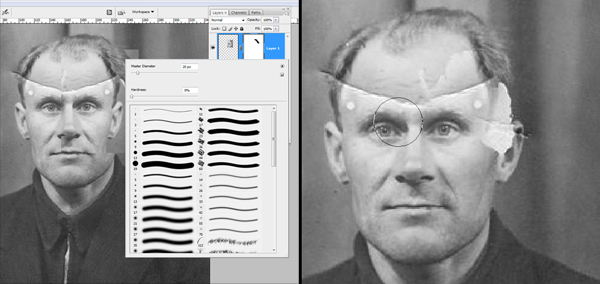
At this point, when you drag the selection over to where the left eye should be, you would want to lower the Opacity and align the eye with what's left of his torn away eye behind your new layer. When you have it aligned, hit enter or hit the mark I've placed the green circle around (shown below) to commit the changes. Then raise the Opacity to 100% again.
Step 10
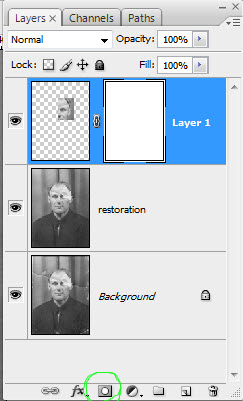
Now, with the layer selected hit the mask-button (as indicated by the green circle below) too apply a mask.
Step 11
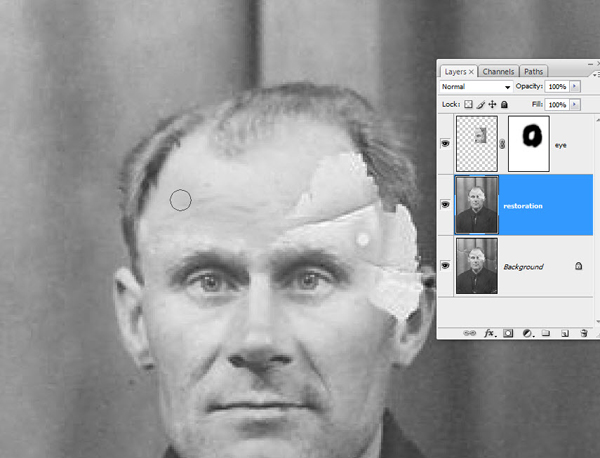
Now we want to paint with black in the mask to hide the areas we don't need or don't want to see. When using masks the rule is: white reveals and black conceals. If you need soft transitions, use gray. A good way to paint away areas in your selection is to lower the opacity of your brush, then sweep across the areas you want to get rid of until you have the transition result between the two layers you would want.
Bonus Tip: Keep your finger at the X button to flip between black and white. It's always good to go back and forth like this in smaller areas until you get what you want. The D key will make your foreground and background colors black and white if the colors are set to something different than black and white. If you want to see only the mask on your screen to smoothen out the areas, hold down the Alt key and click the mask.
Step 12
Now you want to do the same process with the ear. Depending on the picture you would try out different free transform modes you also could use. For the ear I did use warp. I also did a minor part from the hairline at the man's right side, rotated , and scaled it slightly just to get a better start for the missing hairline. Then I cloned where needed.
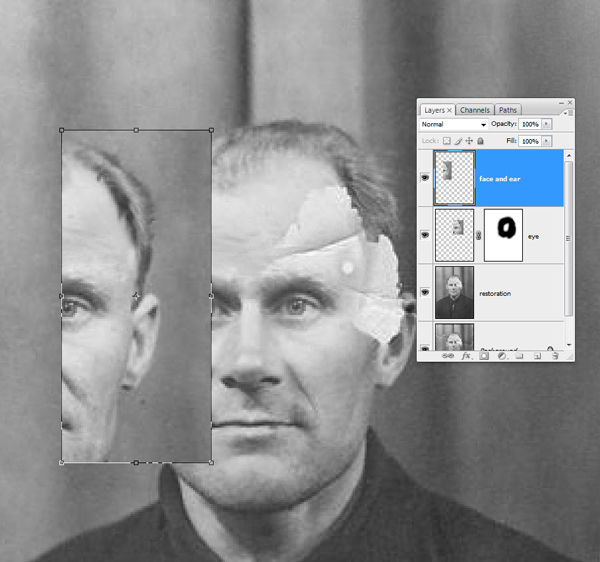
If you look at my layers here, don't be confused. The "retouch" layer is the next step, but when doing the picture I didn't decide on the hairline right away. The layer called "Layer 1" is the hairline layer.
Step 13
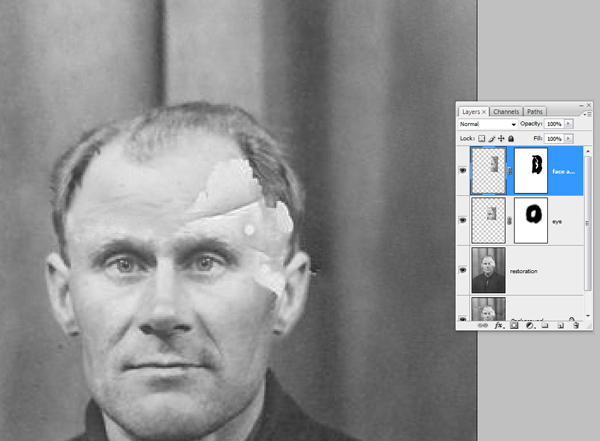
After getting all the larger parts into place, I went back to the Clone Tool and touched up all the edges I needed to fix. This is what I put on its own layer; the "retouch" layer. Usually you want the Opacity on the Clone Tool set down so you get better control over the cloning and can do them in more than one sweep. Just drag over the area until you get the result you desire. Command + Z is of course something you want to keep your fingers at during the whole of this process.
Step 14
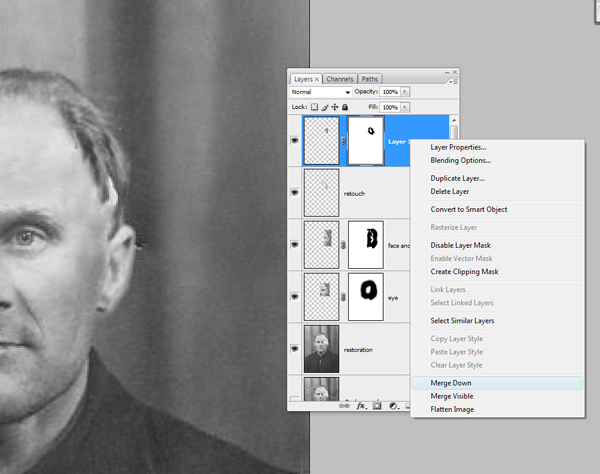
Often when you go about doing the last retouching, you would use different layers for different parts. If you don't want a lot of layers, just merge them down when you are satisfied. I usually do small parts on different layers and merge them back to one "retouch" layer, but never merge these basic layers.
You don't want to merge everything together if you later see something you didn't spot right away. It's always good to be able to go back and delete only the "retouch" layer, and fix that, or the eye-layer, if you found something out of place in it, and so on.
Step 15
So now the restoration part is done.
Step 16
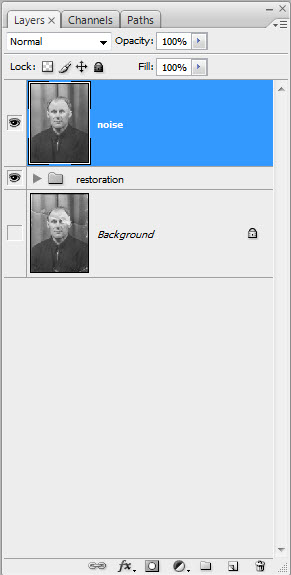
The next thing I do is to select all the layers and group them. Command + G. Then I make a new layer from this group. Command + Shift + Alt + E and rename it "noise." This layer is for our noise reduction. One thing I want to point out, which I probably haven't mentioned.
As you can see from my layers below I've kept the original file in the PSD as the background layer, and then turned it off. I like to keep the original file together with my PSD file, so I always start by jumping this (Command + J). This way I get an exact copy to work from, then turn of the background.
Bonus Tip: If you hold the Alt key down while clicking on the eye in front of the background image, you turn this layer on and all the other layers off. Click again to turn this layer off, and all the others on. Good for quick comparisons.
Step 17
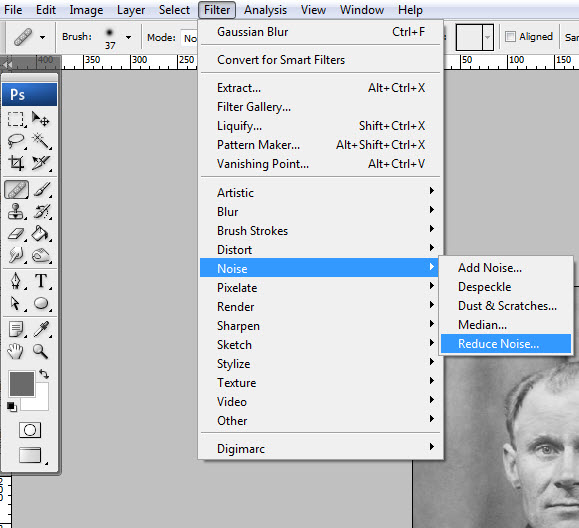
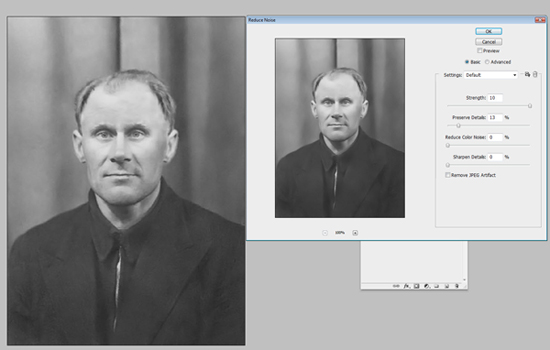
Now we remove noise in the image. Noise reduction is done in various ways, but here I use the Reduce Noise filter found under Noise. I exaggerated the noise reduction a little for this tutorial, and believe my original numbers were 8 for the strength and about 20 for detail.
Another tip here is to go into the Advanced Dialogue and crank the strength up to full in the blue channel with 0 on details. In the red channel you crank also the strength up high with some detail, and leave the red channel with no alterations. This lets the red channel keep some of the details in the picture without blurring it too much. This technique I got from Taz Tally, and is what you also would want to do to remove patterns or scan lines.
Step 18
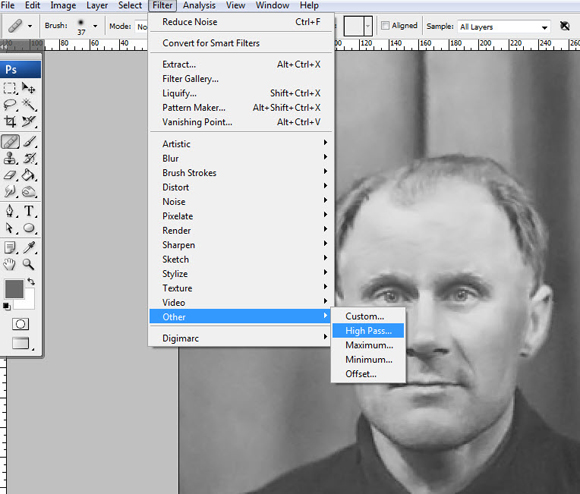
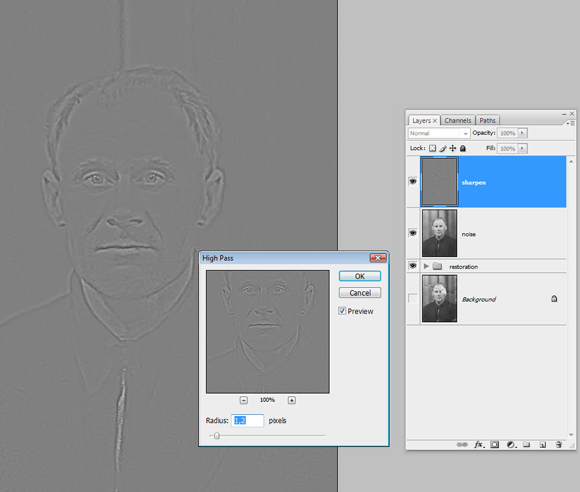
After noise reductions we would go on to sharpening. Sharpening is another big topic, but a common use, and a good one, is the High Pass Sharpening. When you apply the High Pass filter, you would want to use low settings.
For this tutorial, I have raised the values a bit too much, and you would want to see less in the gray picture than here. The edges are what you want to sharpen. There are also some technical issues you want to keep in mind.
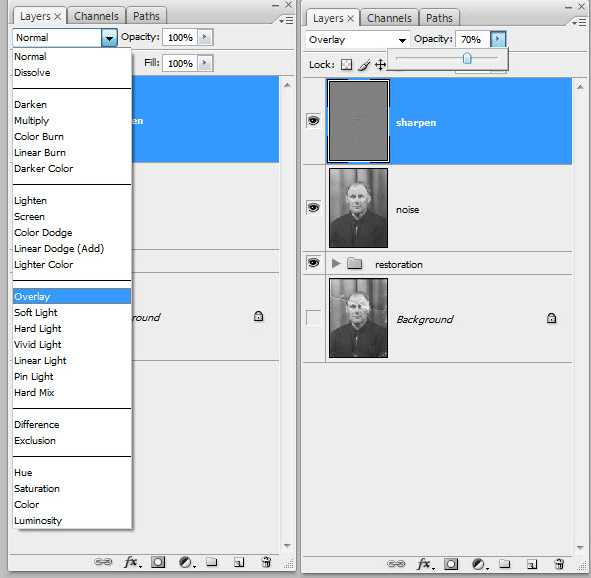
When you sharpen for print, you always want to over-sharpen a little on screen. Printers have a natural way to blur out pictures a little. When you have applied the High Pass filter you would set the Blending Mode to Overlay or Soft Light. I usually make use of a little over sharpen anyhow, and then lower the value by using the opacity control.
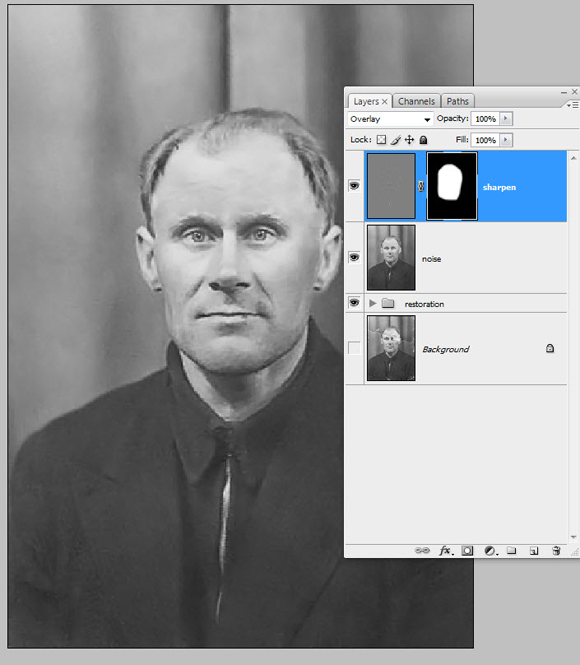
Bonus Tip: Often you would want to sharpen only areas of the picture. In the example picture below, I've made a mask and painted away everything but the face, so this is the only part that gets sharpened. Often this technique is used for only the eyes.
The technique works also well using curves to lighten or darken areas of the picture. If you only want the eyes lighter, you would make a curves layer, hit Command + I to invert the mask, making the mask go black, and paint back with white where the eyes are, and so on. It's quicker to invert the mask than starting to paint away everything you don't want.
Step 19
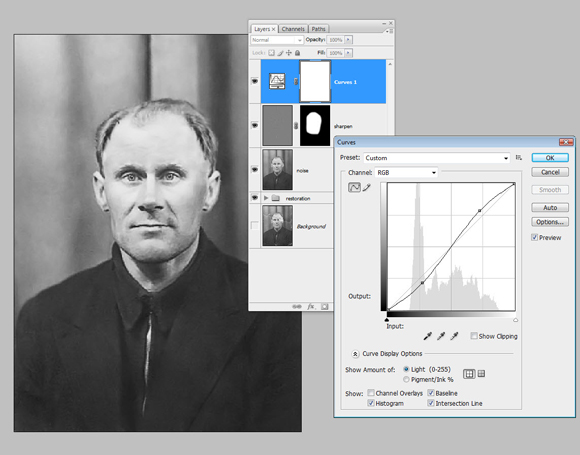
In this final step, I did adjust the contrast with an s-curve. This step I didn't make use of in my original file, and you would probably want to do it before the sharpening, but I added it here just to get a more complete workflow overview, since that is the nature of this tutorial. I often make use of Command + Shift + Alt + E to make a new layer from the layers below, and that's what I would have done here.
I would have put the "curves" layer over the "noise" layer, then merging all the layers below to a new layer on top. Next sharpen this with the High Pass filter, keeping the curves layer intact, just in case I wanted to go back and adjust the last two steps.
Conclusion
So this was a the whole process of restoring an old, torn photograph. But keep in mind that a lot of these steps can be explored in greater depth. Always experiment and look for things you could add to your workflow to get an even better result.