Hey everybody! In this tutorial, I'll show you some great techniques to achieve HDR effects. There are a lot of different techniques out there, but I prefer to use this specific filter called LucisArt. Soon there will be a new and better release called Lucis Pro. Till then we'll use this one. You can buy it from their website or take the 30 days trial to test and see if you like it. Also, the filter is only available for Windows. The new Lucis Pro will also be available for MAC though.
Part I - Applying HDR Styling to a Portrait Image
This tutorial has three parts. We'll review adding HDR styling to multiple types of images using the LucisArtfilter. In this first part, we'll work on adding more interest with HDR styling to a portrait photo.
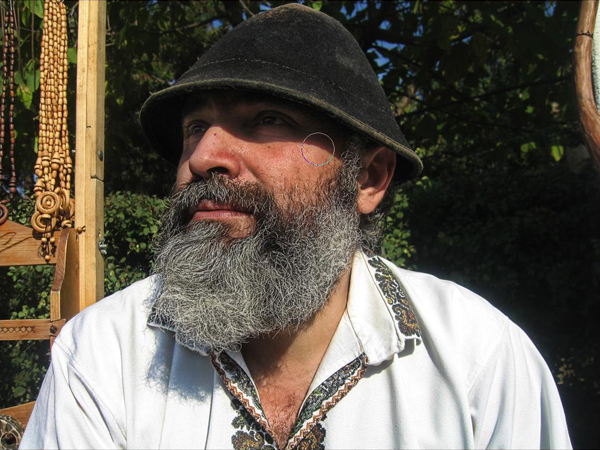
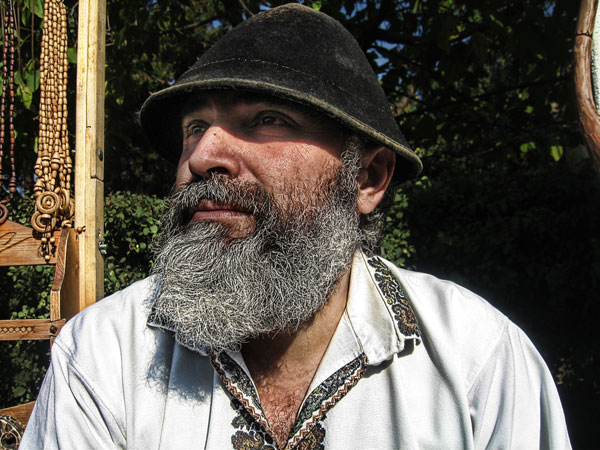
Final Image Preview for Part I
Before we get started with Part I, let's take a look at the image we'll be creating. Click the screenshot below to view the full-size image. As always, the layered Photoshop file is available via our PSDTUTS Plus membership.

Step 1
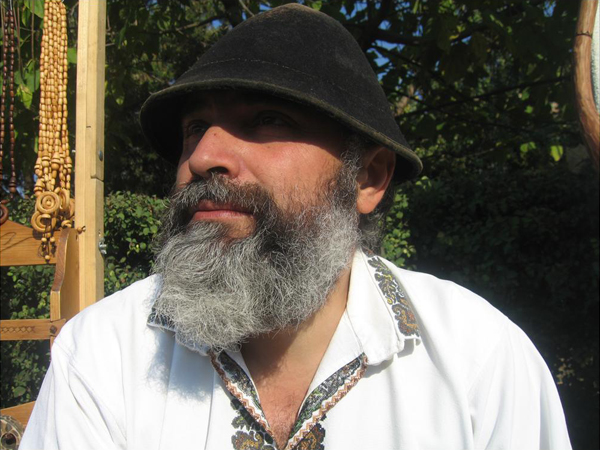
Open up your image in Photoshop. I'll start with a portrait image I shot.
Step 2
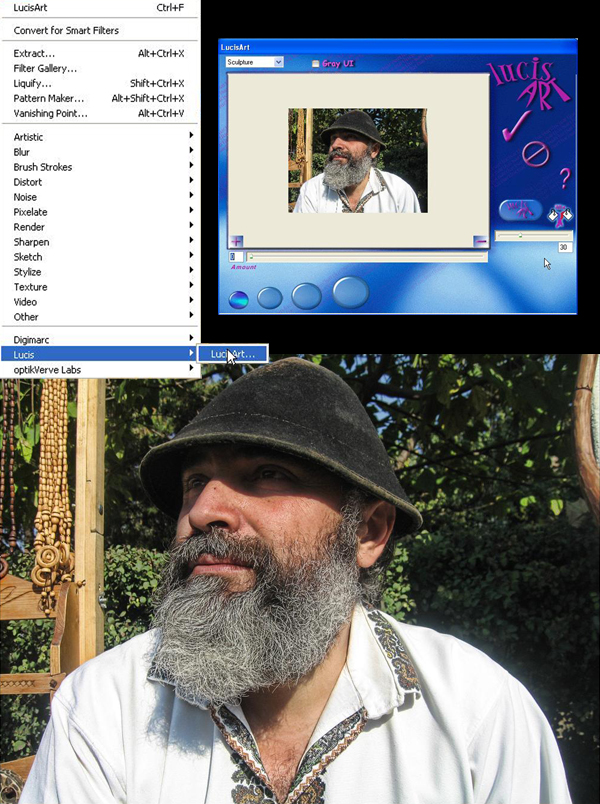
First thing you need to do is to duplicate the layer (J). Then go to Filter > Lucis > LucisArt. Here you will need to select the Sculpture option and set it to something like 30.
Step 3
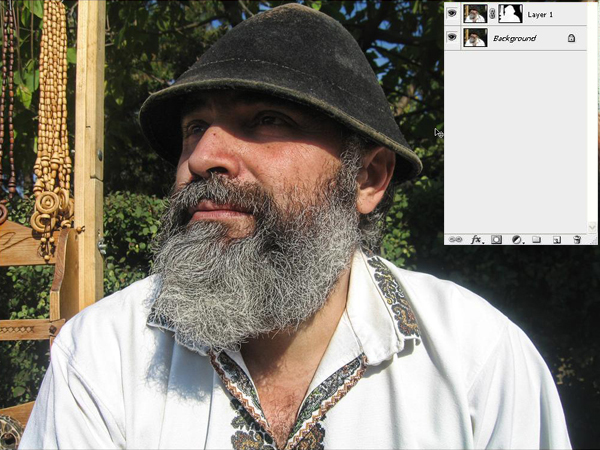
Create a Layer Mask for this layer and fill it with black. This will hide all the effect. Then, take the brush (set to white) and draw over the man and the products he was selling. Leave the trees untouched.
Step 4
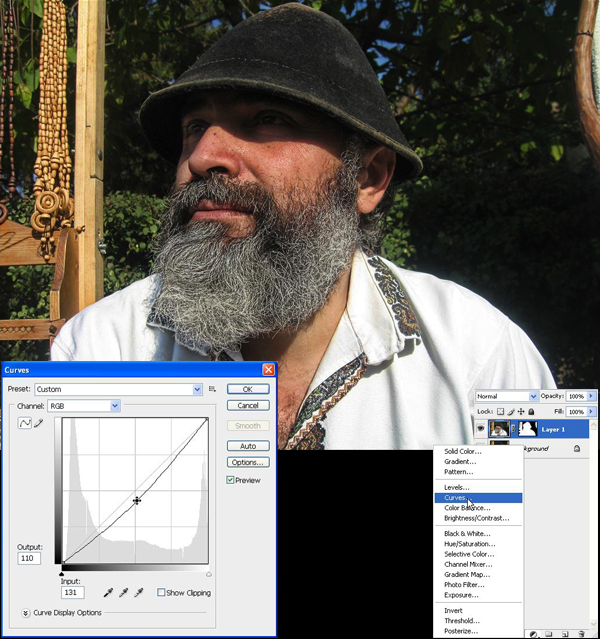
Next I will add a new adjustment layer. Select the curves from the drop-down menu.
Step 5
Now using a black brush, simply draw over the eyes. But do this into the mask that was automatically created. In a portrait it is important that the eyes are not covered by the shadow. They need to be visible.
Step 6
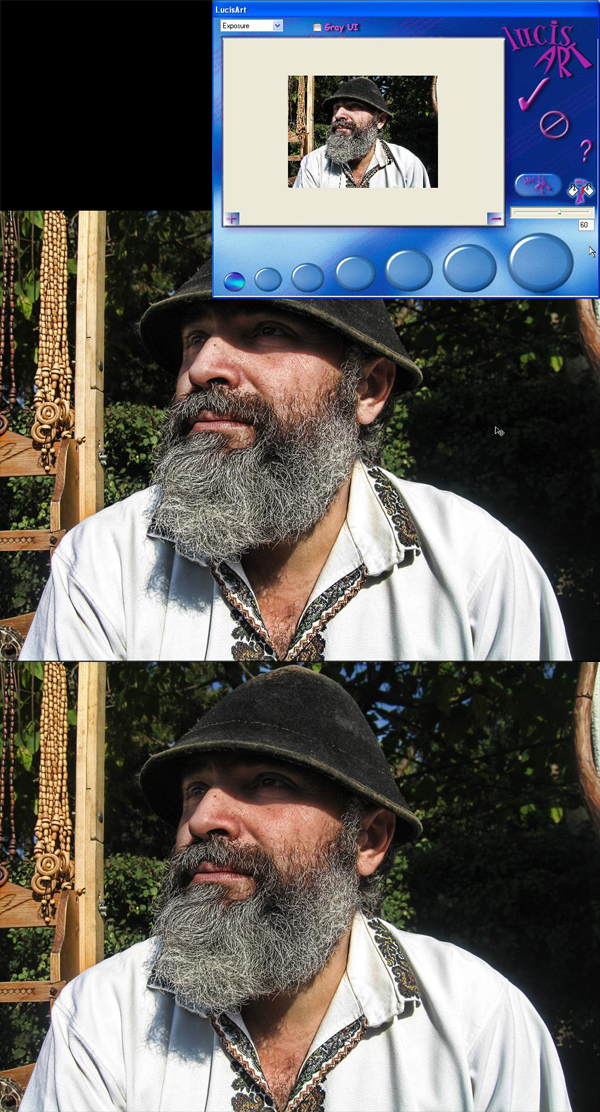
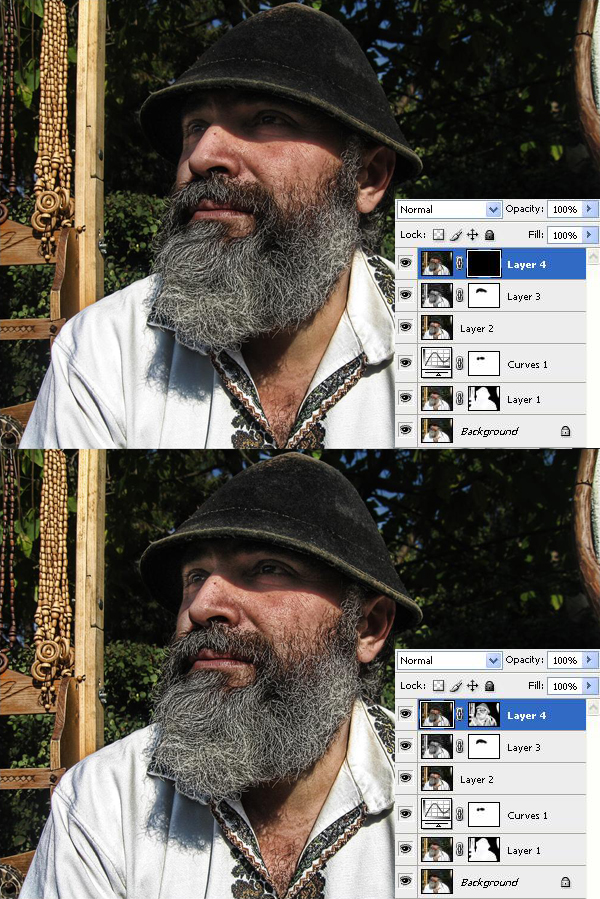
Next press Command + A to make a selection, go to Edit > Copy Merged, and again go to Edit > Paste. Then go to Filter > Lucis > LucisArt and this time select Exposure and set it to 60. Then set the Opacity to 50%.
Step 7
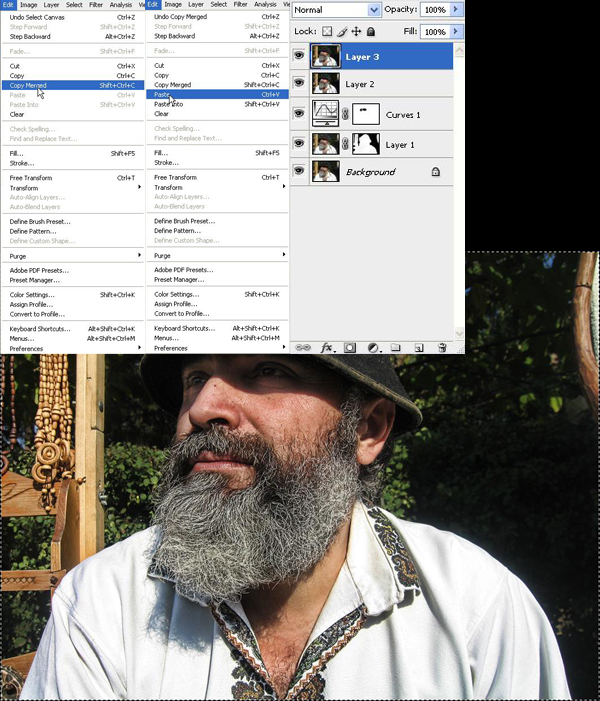
Press Command + A to make a selection over the entire image. Then again go to Edit > Copy Merged and Edit > Paste.
Step 8
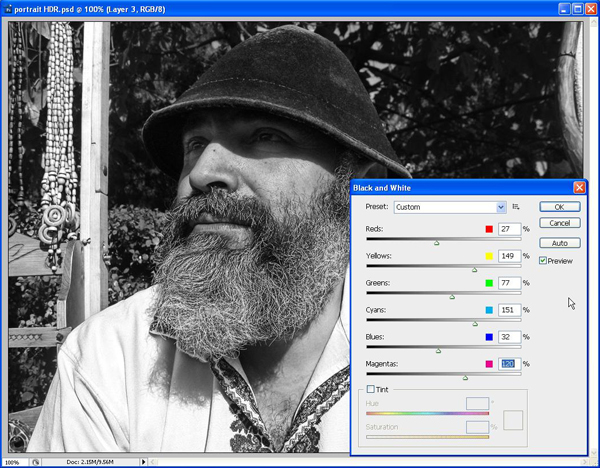
Now that you have all the layers copied go to Image > Adjustments > Black And White and play with the settings there.
Step 9
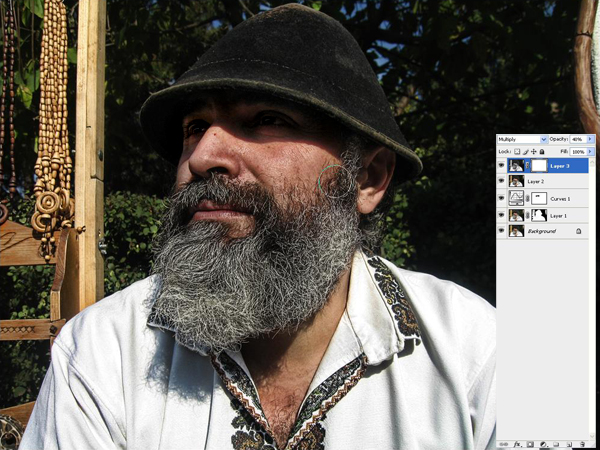
Set the layer to Multiply and the Opacity to 40%.
Step 10
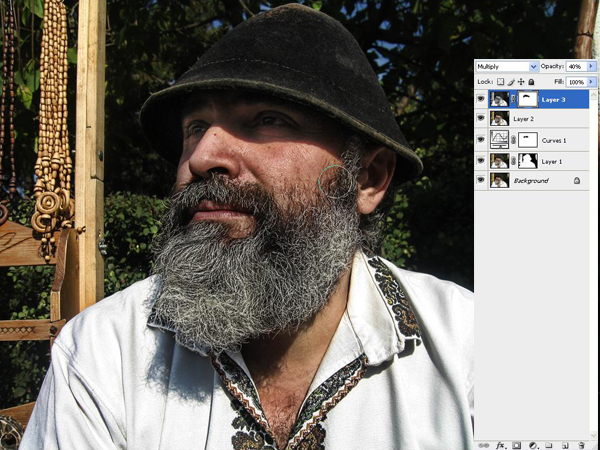
Now make a Layer Mask for this layer and erase some of this effect from the eyes using the Brush Tool (B), just as we did in Step 5.
Step 11
Next you need to press Command + A to make a selection. Then go to Edit > Copy Merged and Edit > Paste. Then go to Filter > Lucis > LucisArt and this time use Sculpture set to 20.
Step 12
Mask the layer and fill it with black. Now using a white brush, you'll need to make visible only a few parts of the image. You'll also need to decrease the opacity of the brush to create the effect gradually. I will try not to draw with the brush over the old man's skin.
Step 13
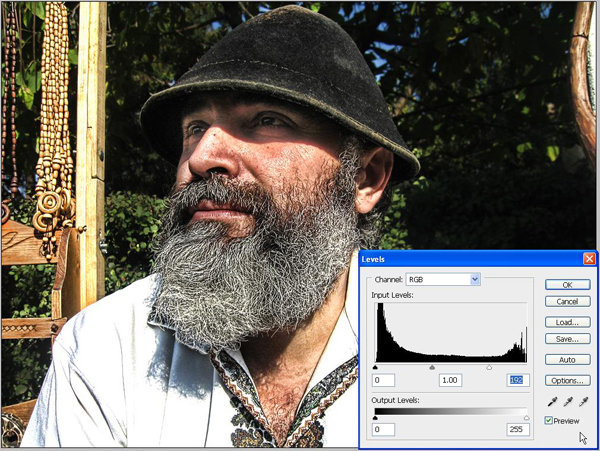
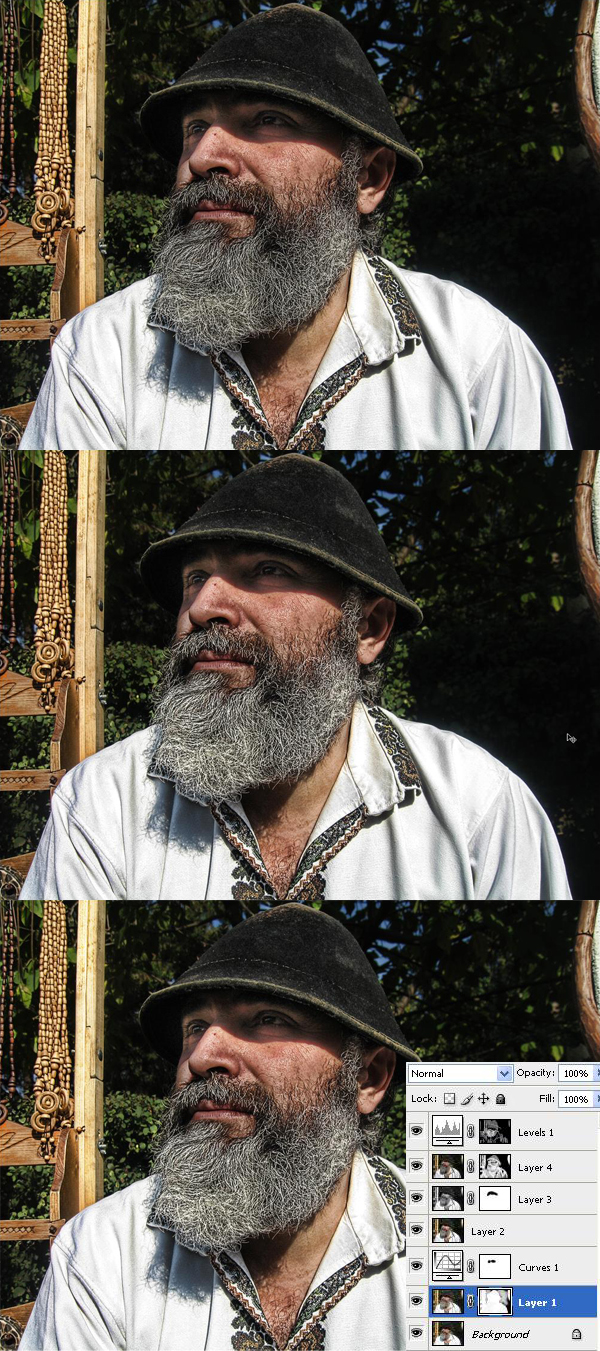
Next I want to make the image more detailed. Select the Levels setting from the Create New Fill Or Adjustment Layer and set the right slider to left at 192.
Step 14
Fill the mask that was created automatically with black. Then with a small white brush set to a lower Opacity, draw over the beard, clothes, and some parts of the wood to lighten them up.
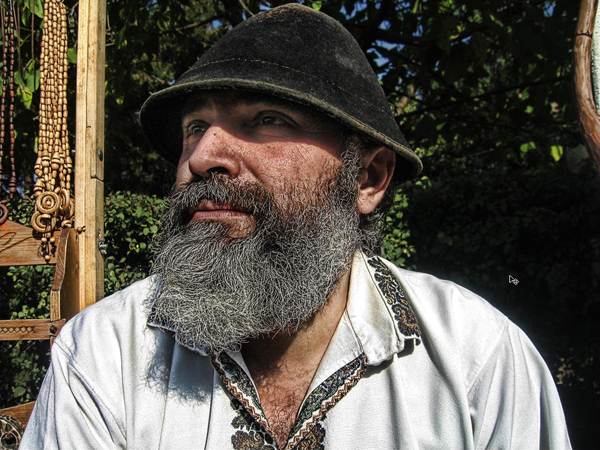
Conclusion of Part I
For this particular image you can maybe use some filters that help you smooth the skin, but I personally like it as it is. The final image is below and you can view the larger image here.
Part II - Applying HDR Styling to a Close-Up Image
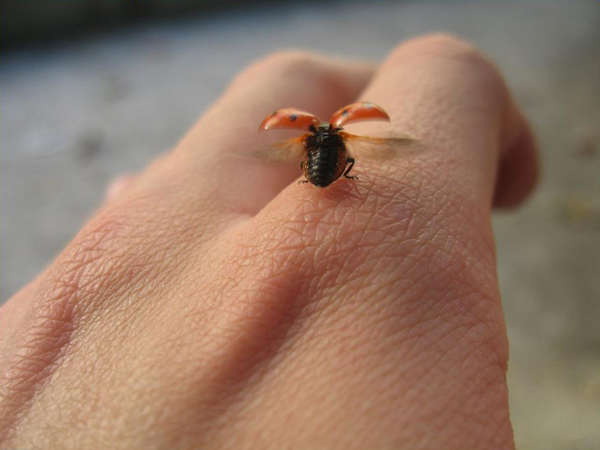
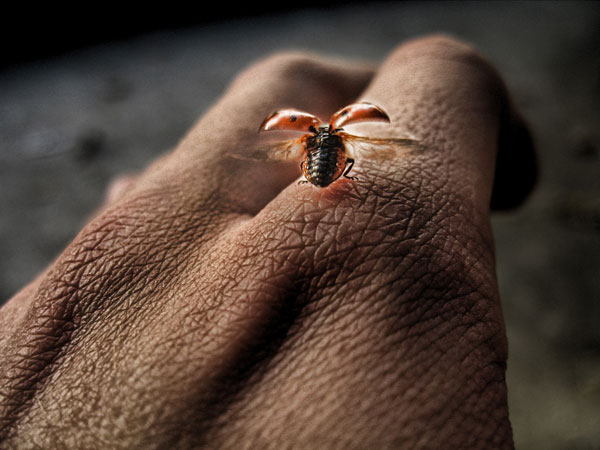
Next we'll do another personal photograph that I actually love very much. This is macro photography. The image isn't perfect because I shot it very fast, as the ladybug was flying away.
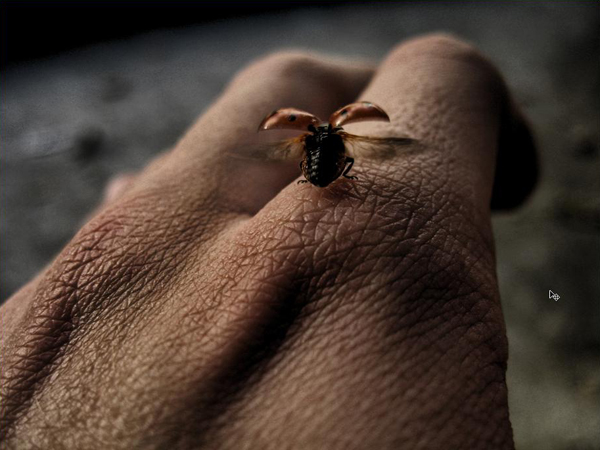
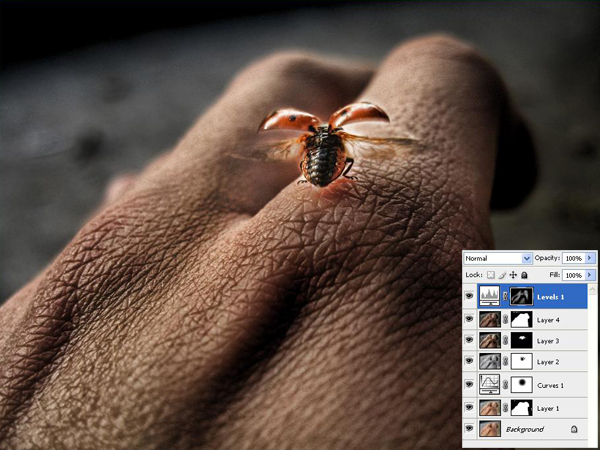
Final Image Preview for Part II
Before we get started with Part II, let's take a look at the image we'll be creating. Click the screenshot below to view the full-size image. As always, the layered Photoshop file is available via our PSDTUTS Plus membership.

Step 1
Open up the image.
Step 2
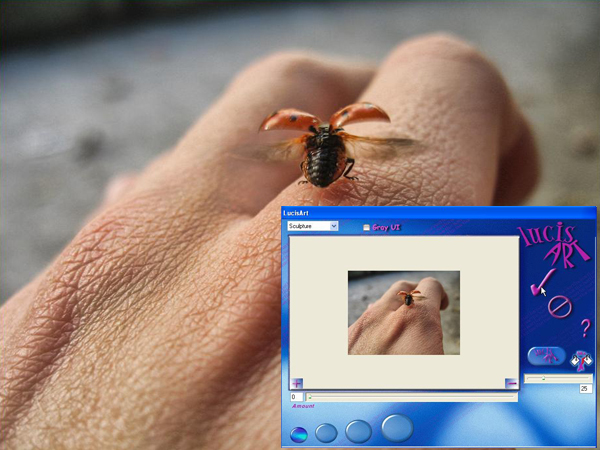
We'll use similar techniques that I showed you in Part I, but we'll use different settings. Also, we'll place the lights in different places. Start by duplicating the image and go to Filter > Lucis > LucisArt and select Sculpture set to 25.
Step 3
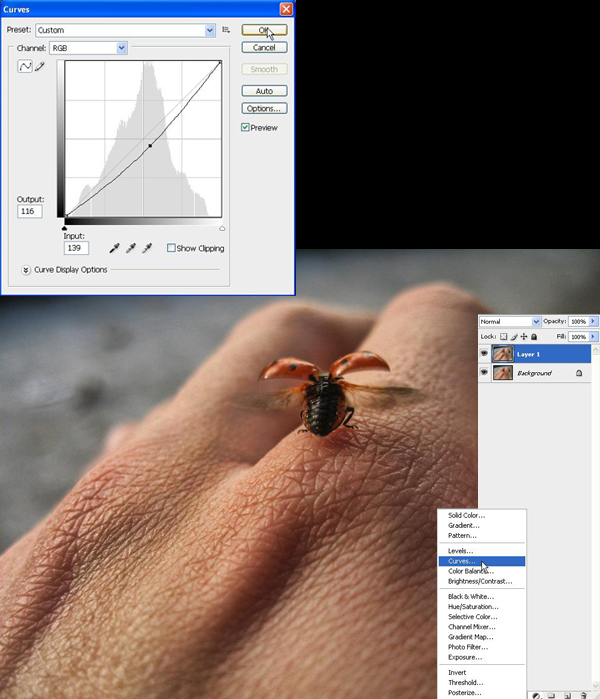
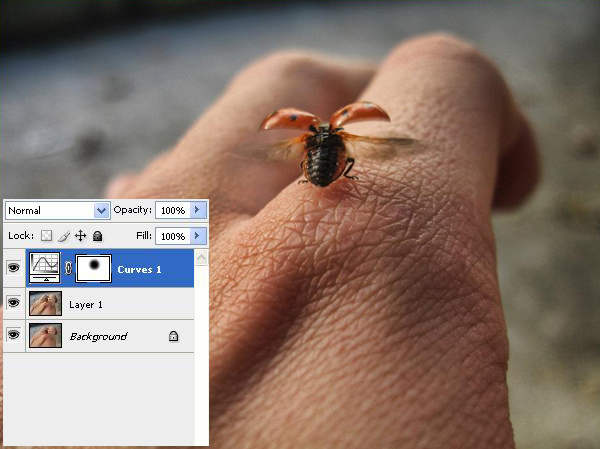
Next go to Create New Fill Or Adjustment Layer and select Curves, and drag the line down a bit.
Step 4
Now using the Gradient Tool (G) set to black, lighten the ladybug, as she is our focal point here. Do this in the Layer Mask thumbnail.
Step 5
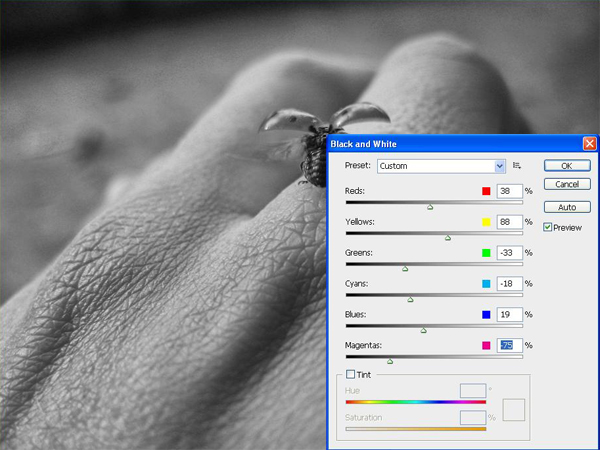
Next press Command + A to select everything, go to Edit > Copy Merged, and then go to Edit > Paste. Next, go to to Image > Adjustments > Black and White and use my settings below, or maybe play with them as you see fit.
Step 6
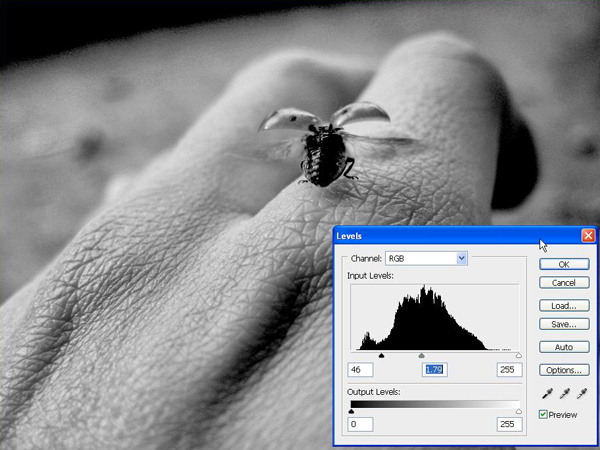
Next go to Image > Adjustments > Levels and set it at: 46, 1.79, and 225. Then press OK.
Step 7
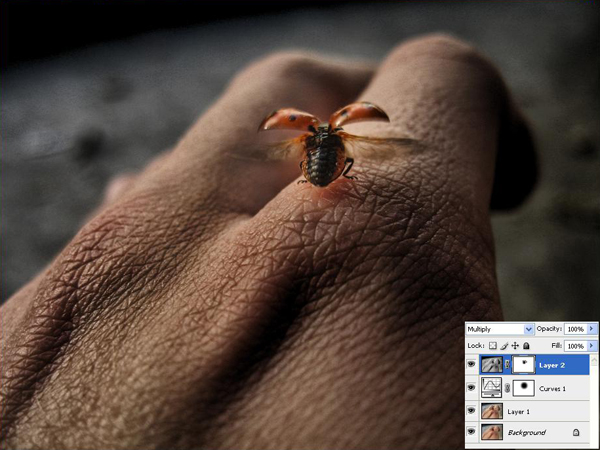
Set the layer to Multiply.
Step 8
Make a mask for this layer. Then using the black Gradient Tool (G) set to Radial, lighten the ladybug, as I did below.
Step 9
Next press Command + A to select everything, go to Edit > Copy Merged, and then Edit > Paste. Next go to Filter > Lucis > LucisArt and set the Exposure to 80.
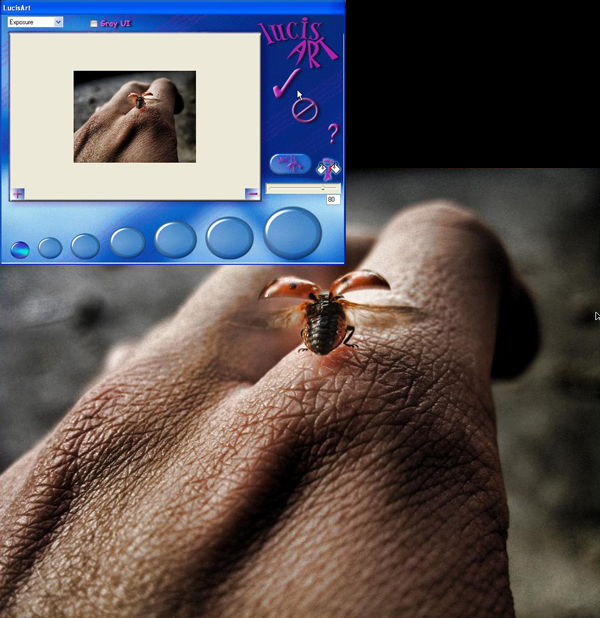
Step 10
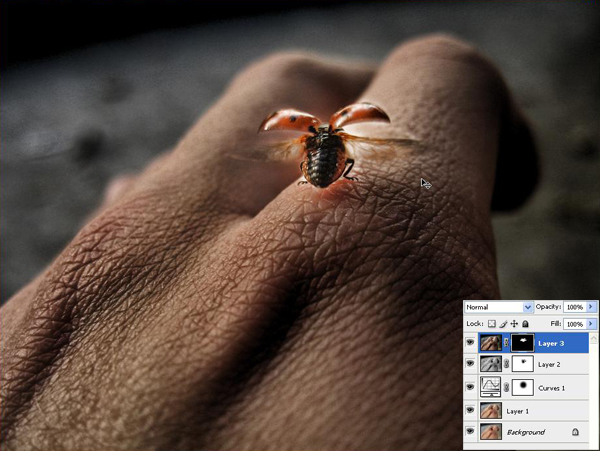
Mask the layer and fill the mask with black. Next using a white brush you'll need to draw over the ladybug again to bring some more light on her.
Step 11
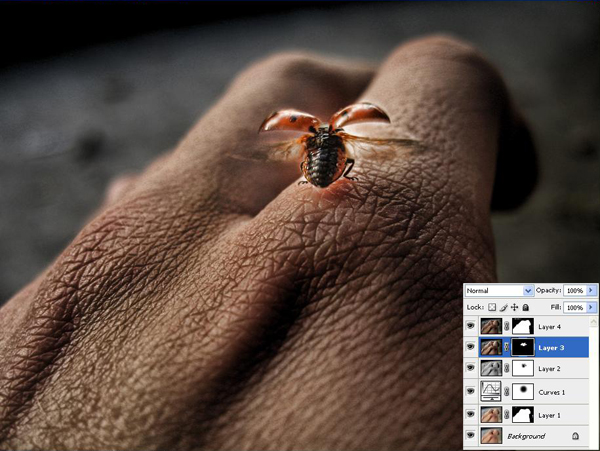
Press Command + A to select everything again, go to Edit > Copy Merged, and then Edit > Paste. Next go to Filter > Lucis > LucisArt and set Sculpture at 10.

Step 12
Mask it and using a black brush, cover the background behind the hand.
Step 13
Last step is to go to Create New Fill Or Adjustment Layer and select Levels. For the Levels use 0, 1.00, 197 and then press OK.
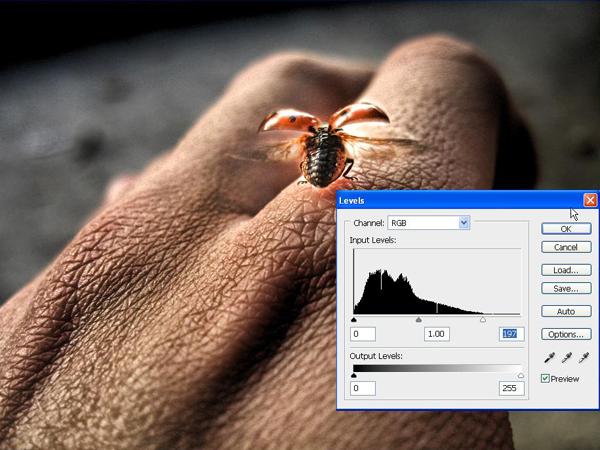
Step 14
Mask the layer and fill it with black. Then with a small white low Opacity brush, simply draw over the ladybug to make her more detailed. Try not to draw all over her, just a few parts to make them pop out.
Conclusion of Part II
This effect is something I personally use. You can experiment with the filter and get a lot of different effects. The final image is below and you can view the larger image here.
Part III - Applying HDR Styling to a Scenic Nature Image
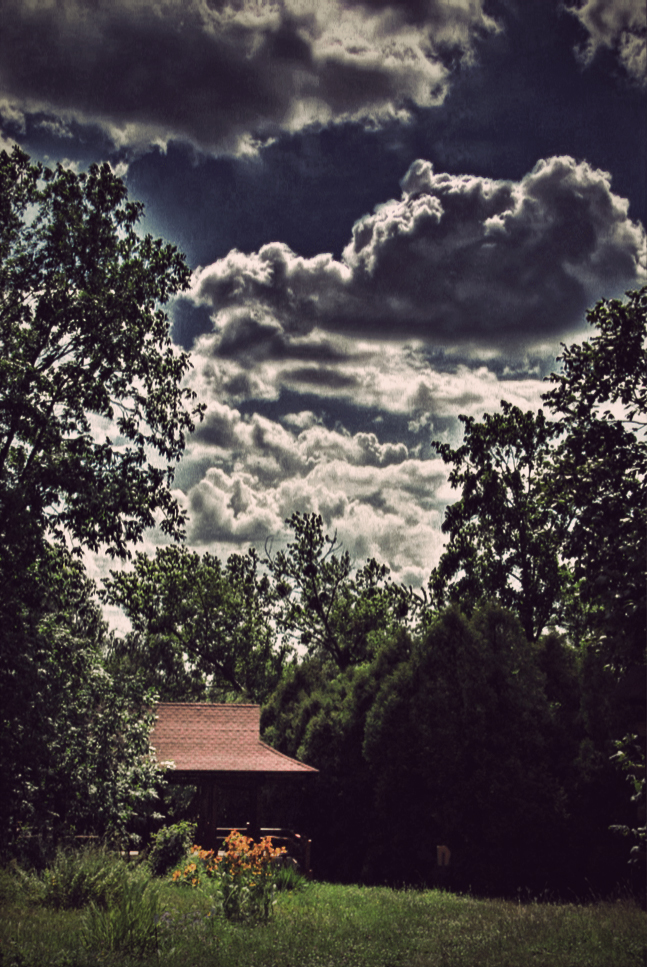
This is going to be the last image that we're going to work on in this multi-part tutorial. It's a natural scenic photograph being given an HDR style.
Final Image Preview for Part III
Before we get started with Part III, let's take a look at the image we'll be creating. Click the screenshot below to view the full-size image. As always, the layered Photoshop file is available via our PSDTUTS Plus membership.
Step 1
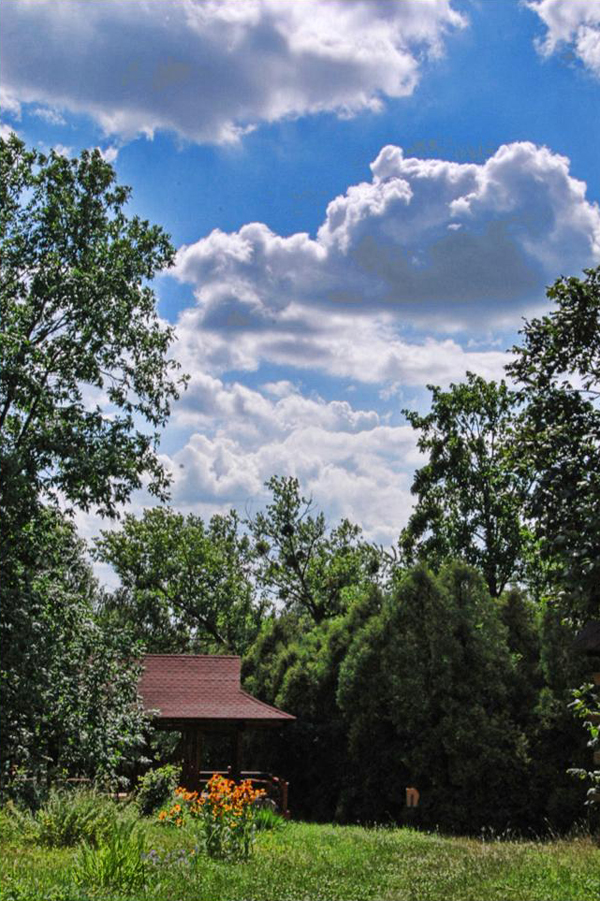
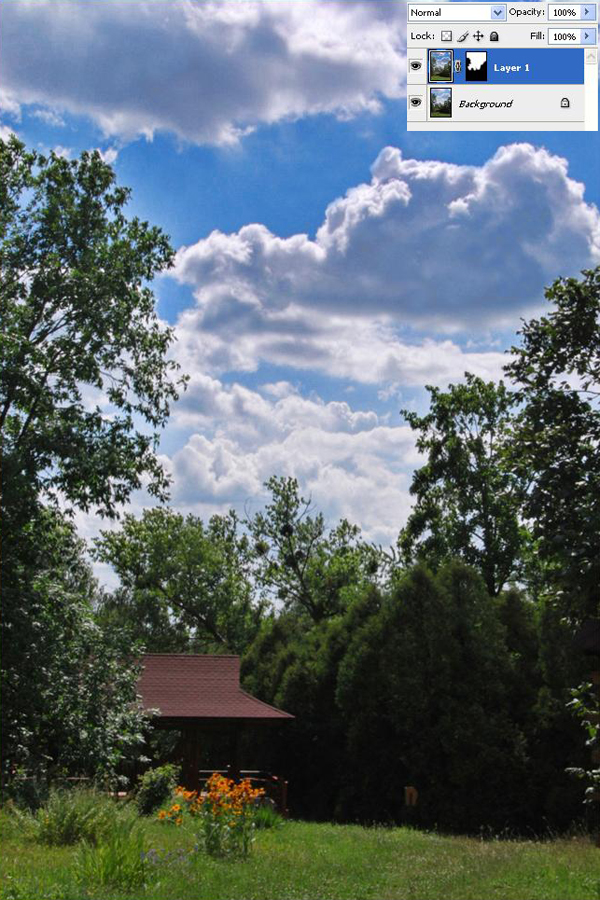
Open up your scenic nature photograph.

Step 2
Duplicate the layer. Then go to Filter > Lucis > LucisArt, and set the Sculpture to 30.
Step 3
Now mask the layer and fill it with black. Then with a white brush draw over the clouds. As you can see my clouds get some really ugly pixels so I used the Clone Tool (S) to cover them up.
Step 4
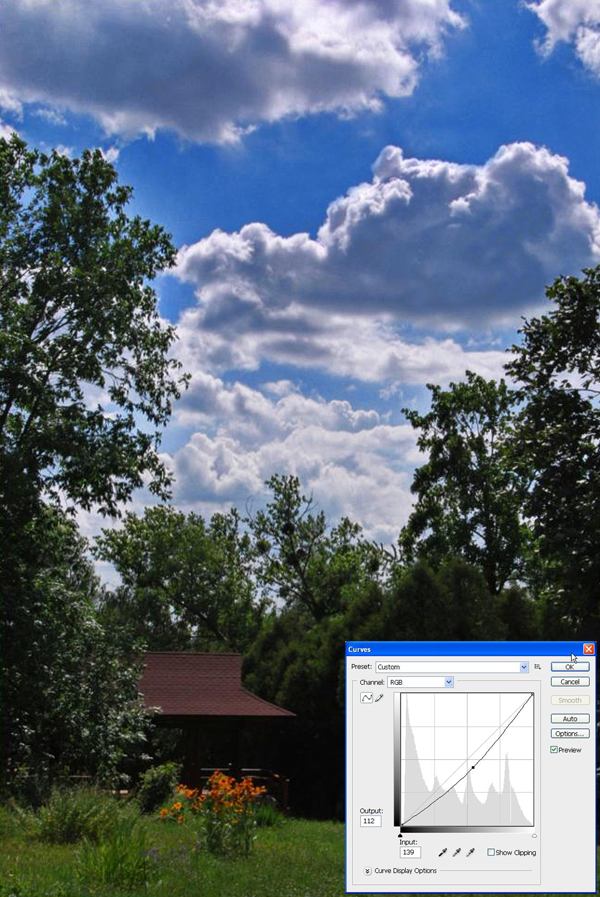
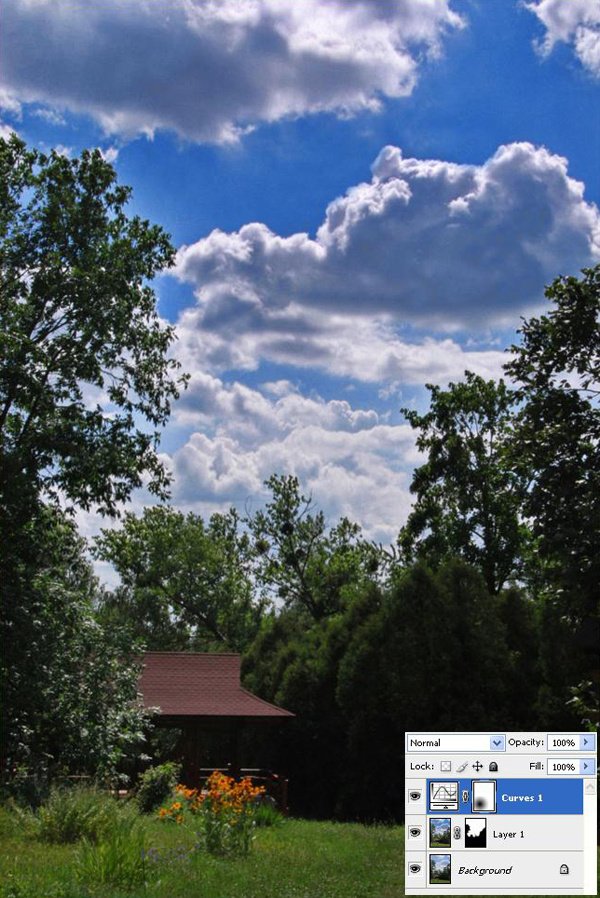
Next you need to go to Create New Fill or Adjustment Layer and select Curves. Drag the line a little down and press OK. By doing this you will darken the image a little.
Step 5
Next use a black Radial Gradient (G) and lighten the gazebo. Do this into the mask of the curves layer.
Step 6
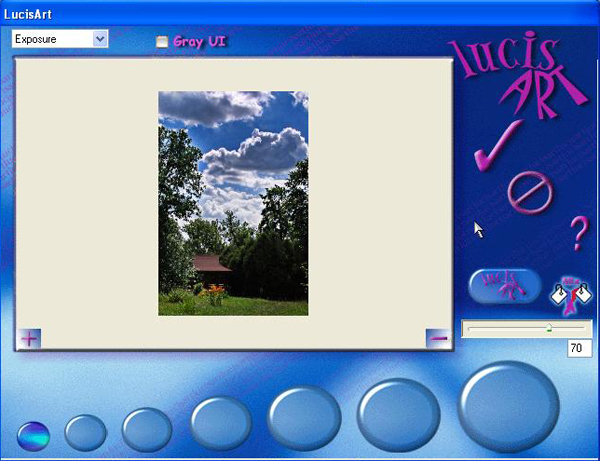
Next press Command + A to make a selection, go to Edit > Copy Merged, and then Edit> Paste. Next go to Filter > Lucis > LucisArt and select Exposure and set it to 70.
Step 7
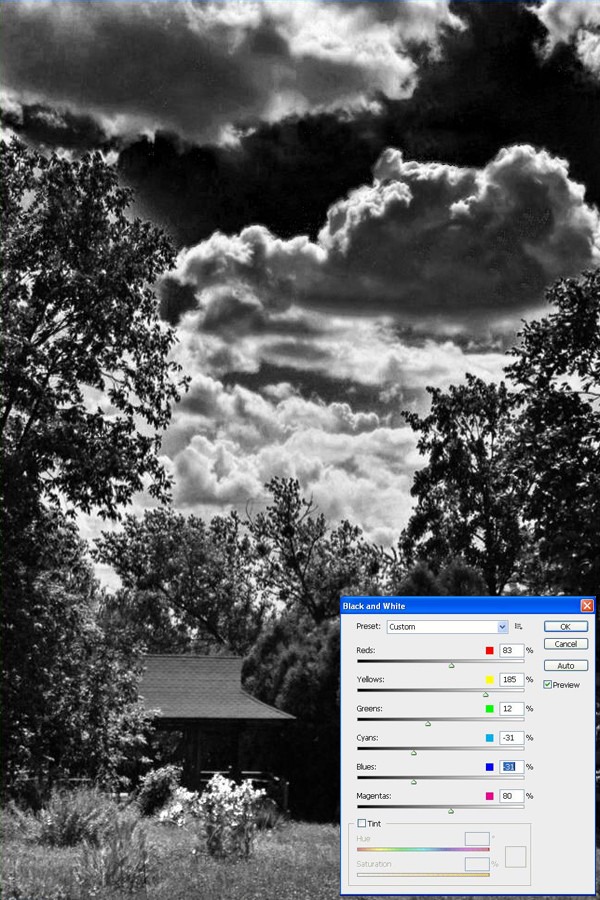
Next press Command + A to make a selection, go to Edit > Copy Merged, and then Edit > Paste. Next go to Image > Adjustments > Black and White and play with the settings.
Step 8
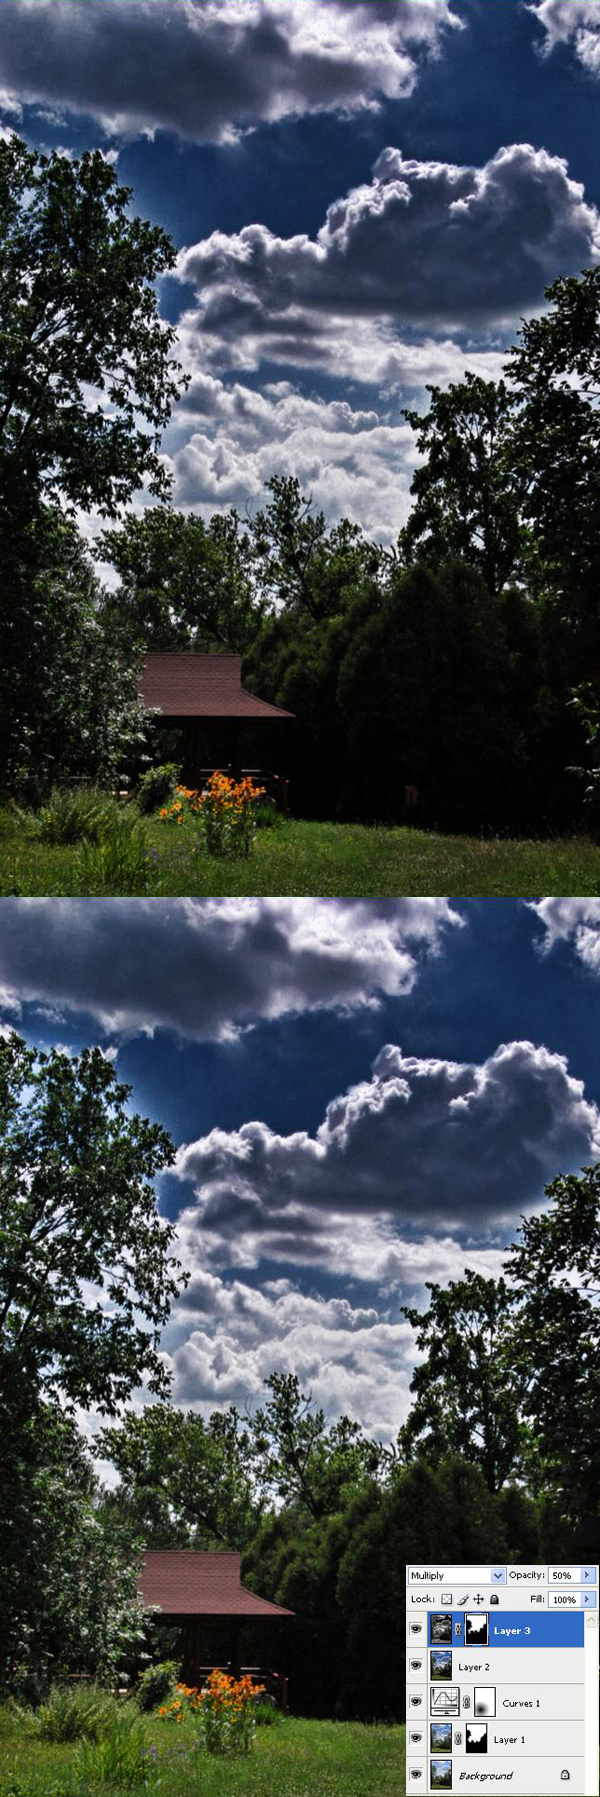
Set it to Multiply and Opacity 50%. Next mask it and using a black brush draw over the lower side.
Step 9
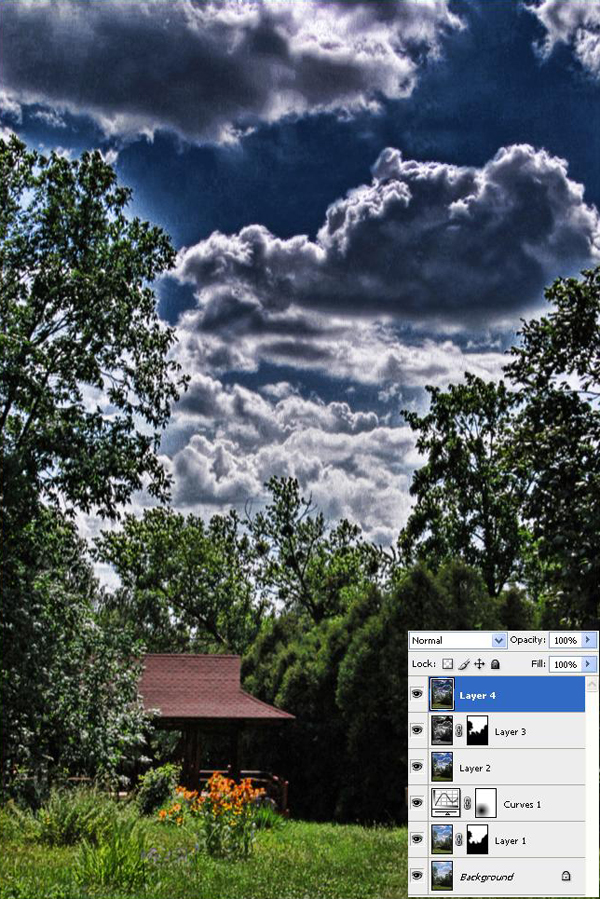
Next press Command + A to make a selection, go to Edit > Copy Merged, and then Edit > Paste. Next go to Filter > Lucis > LucisArt and set Sculpture to 20.
Step 10
Mask the layer and fill it with black. Then using a white brush, paint over the clouds.
Step 11
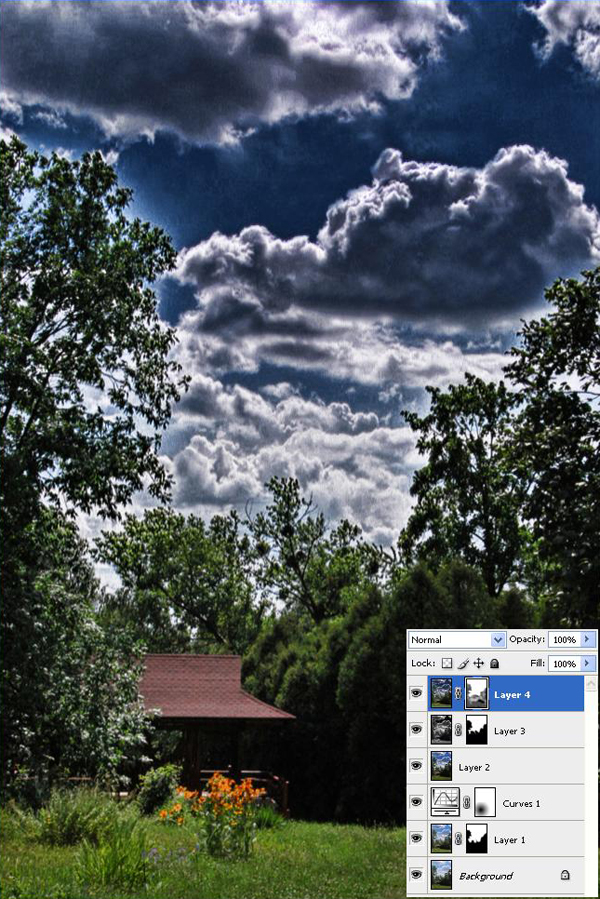
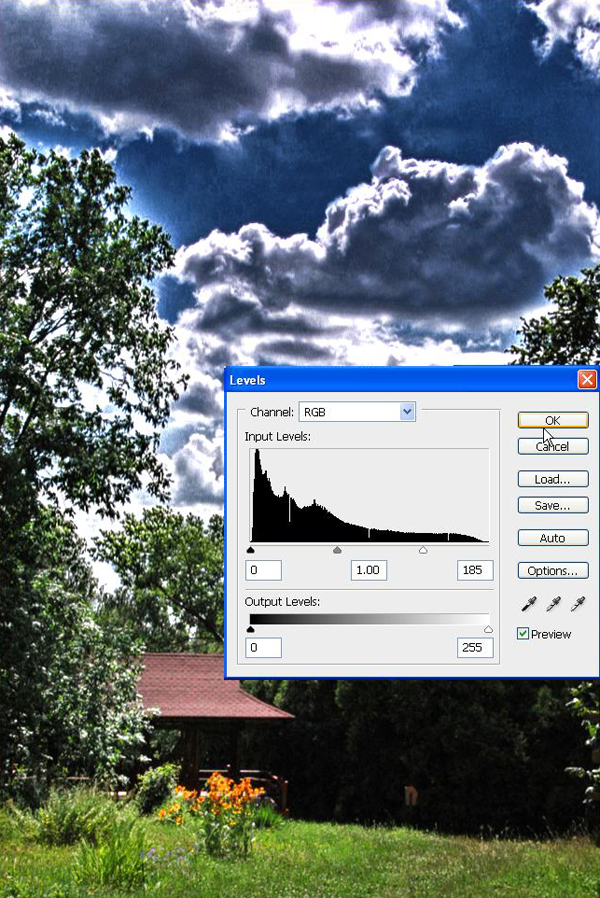
Go to Create New Fill or Adjustments Layer and select Levels. Bring the right slider to the left at 185.
Step 12
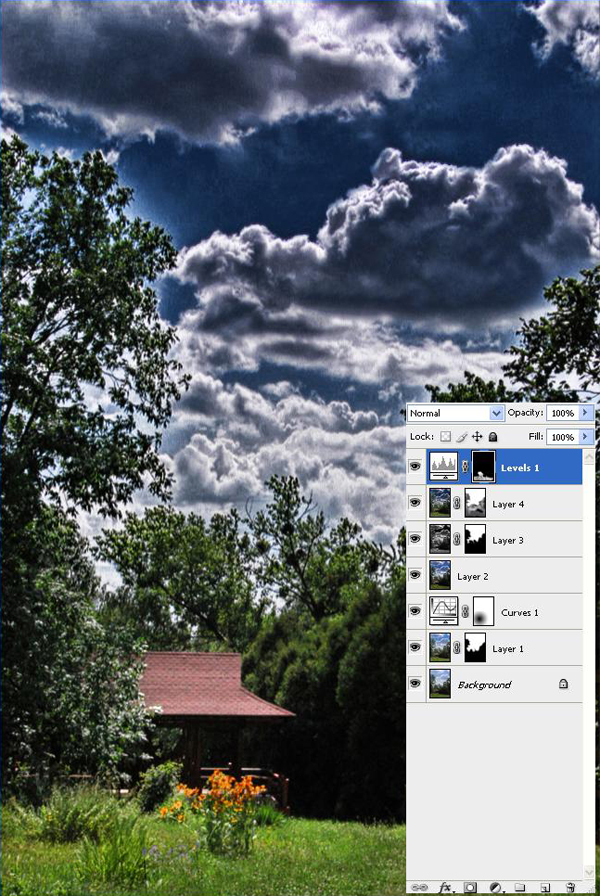
Fill the mask with black. Then using a small white Brush with a low Opacity, draw over the gazebo and grass.
Conclusion of Part III
In the end, you can add a vintage effect as well. I've added one of my favorites vintage actions with the rest of the tutorial PSD files in the download for PLUS members. The final image is below and you can view the larger image here.

Great tut! Thanks for sharing!
ReplyDelete