Transform this photo: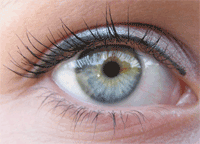
Into this one: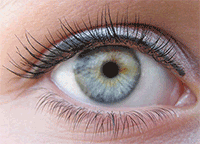
Step 1
Open our photo (you can download it from here)
Step 2
We will have to different layers for upper and lower eyelash because they are dissimilar and we are going to use two different methods for each of them. So make new layer (CTRL + N) and name it "upper". Go and pick Pen Tool (P on the keyboard). Use settings as in the picture below.![]()
Now zoom in (you can use CTRL + + combination) on the upper eyelash and start drawing with pen tool. Our goal is to make our path as more similar to actual shape of eyelash as possible (don't be afraid, little practice and you'll see that this is not so hard at all). I always make 3 point when working on upper eyelash, because it is easier to adjust curves that way.
You make eyelashes mainly on places where actual eyelashes are thiner or where empty spaces between them exist. One more thing to remember and that is that eyelashes are not all the same thickness and color so be sure to change colors and brush size, but you'll see in next steps how I did that.
After making first eyelash shape with pen tool (I got it something like this) 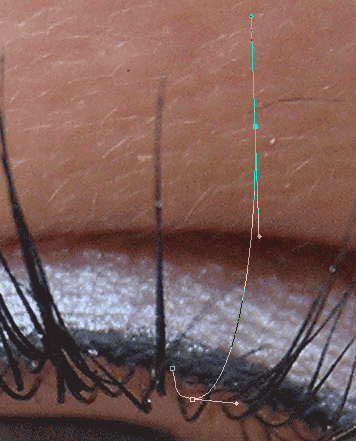
click on Brush Tool and select size of brush and color. I choose size to be 2px and color something like #1e201b (you can use Picker Tool and choose your own selection of color). Now go to the Path palette, click Options, 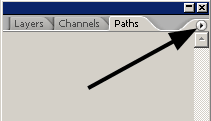
then go to Stroke path 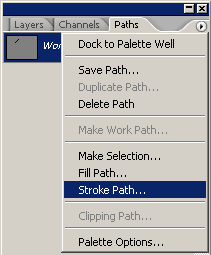
and select Brush tool and check Simulate pressure.
Click OK. Then repeat these steps and don't forget to change brush size (little steps) and color of brush.
Step 3
For now we have finished with upper eyelash and now is the time to go to lower eyelash. Make new layer and call it "lower". We will do almost the same procedure as on the upper eyelash. Only difference is the path shape. In previous step I used a 3 point path style but in this step I'll be using only 2 points to make an eyelash path, just like this one below.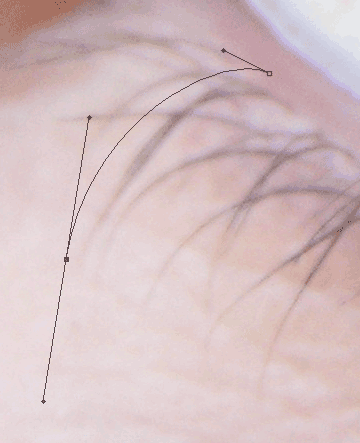
HINT: You don't have to draw path for every eyelash. Use Direct Selection Tool (A), select any point on the path and then just drag that point where you want new eyelash!
Now, stroke as many eyelashes as you want.
Step 4
Because we stroke every eyelash with Brush tool we want to smooth a little bit edges of drawn eyelashes. So, click on "upper" layer and go to FILTER - BLUR - GAUSSIAN BLUR and set values as I did.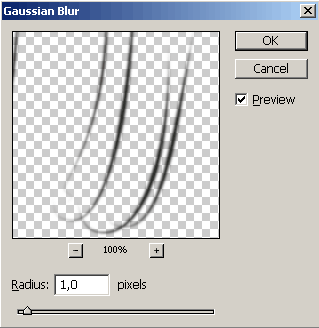
If you want you can use Blur Tool to blur just a little bit more those eyelashes to the left and right. Repeat same procedure for "lower" layer also. And for the final touch set Blending Mode for both layers to be Multiply. This will bring more black color to photo.
Step 5
This one is optional. If you want to remove those reflections in the eye use Healing Brush Tool (J) and gently remove those reflections in the eye. We had to do this in this photo but in yours it might not be the case.
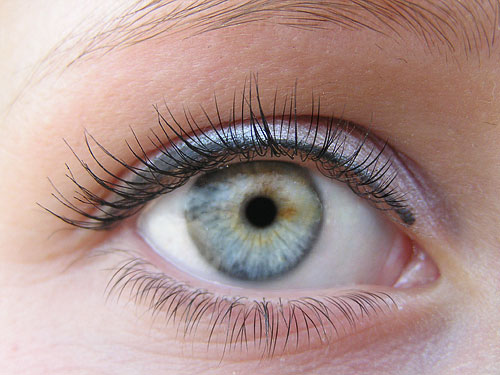
See you!
author of this tutorial is Vladimir Markovic

No comments:
Post a Comment