
Showing posts with label Tecnique. Show all posts
Showing posts with label Tecnique. Show all posts
10 August 2009


20 May 2009
Sports Photography Tips and Techniques

It's no different with sports photography. Those one-of-a-kind photos you see don't happen by accident, or just because the photographer was in "the right place, at the right time."
If you're serious about sports photography, then you need to do more than show up a sporting event with a camera. You might luck into a nice photo people will compliment you on, but if you take these tips to heart, you can rest assured you'll take great photo after great photo.
Know your sport.
I mean that literally. If you are going to photograph a sporting event, you have to understand the strategy well enough that you consider it your sport. That doesn't mean you have to play it or even know all the rules, but you must know what the point of the game is, as well as what is considered excellent performance.
Focus on the players that will give you the best photo.
A lot goes on during a game. There are a lot of great pictures that you'll probably miss. Focus on getting the best shot you can in any particular moment, and don't worry about the ones you missed. During a tennis match, take time to focus on one player's serve. Then, switch your attention to the other players return. Very quickly, you will find yourself becoming a part of the rhythm of the game. And once you reach that point, you'll see opportunities as appear.
While photographing a high school basketball game, I focused on the best player on each team. Now, I knew that other players would make great shots, but I also knew that teammates would look to both of these players. When the ball came to them, I took pictures. When they passed the ball, I took pictures. I avoided getting too distracted by other action. Both of these players went on to be stars in college, one of them played in the NBA, and I got some great shots that night.
When those opportunities for the "money" shot do appear, don't get caught unprepared. I've known photographers who've forgotten to take their lens caps off and missed something great. Or, they may not have changed their ISO setting from the last time they used their camera. If you want to manually control the settings, then be sure to take your camera off automatic so the flash doesn't pop up when you least want it to.
Remember, you're not just there to watch the game. You're there to take a great photograph or two. Keep your camera in your hands, with a clean lens, the right lenses close at hand, and make sure your battery is fully charged.
Also, pay attention to weather conditions. Just because it's raining doesn't mean you can't take great photos. In fact, the drama may be increased by the presence of water on the field. If it's going to be a bright sunny day and your daughter's soccer game is at 7:30 on a Saturday morning, then you'll want to make sure you account for both the glare of the sun and the glint of dew that's sure to be on the fields.
Know your equipment.
Of course, in order to be prepared, you need to know what your camera can and can't do. The last place you want to become familiar with your equipment is at the sporting event you paid $100 to get into, or at your daughter's TaeKwonDo National Championship competition. If you have relatives or friends who play on sports teams, ask if you can take pictures of their events. It will be good practice for you, and they will love to see the pictures you take.
Location, location, location and timing, timing, timing.
These are the two most important things to keep in mind in sports photography, and they cannot be separated. You have to be in the right place at the right time in order to get a truly great sports photograph. And it doesn't have anything to do with luck. If your son's high school football team is marching down the field for a touchdown, then don't get so caught up in the game that you forget to rush to the back of the end zone. From there, you can get the perfect shot of a receiver catching a touchdown pass or a fullback barreling into the end zone.
Don't be shy about getting into position, either. I'm not recommending you sneak onto the sidelines during the Super Bowl and risk arrest. But at many events, if you ask politely and explain what you're doing, officials will let you on the sidelines. Also, you can check ahead to see if you can get a sideline pass. They aren't reserved solely for the media. It's good to check well before the event, but if you can't, try asking at the ticket office when you arrive. After all, the worst they can do is say no!
Imagine a parent's delight when you present them with a picture of their child scoring a touchdown or goal ... imagine your lasting memories when you take a picture of your own child's moments of glory. It will affirm their dedication - and yours - and inspire you both for many years to come.
Matt Smolsky develops marketing programs and has written articles for a variety of clients, including Hoorray, a photo sharing website that offers a free online photo album to new members and is the easiest place to create a digital photo album, calendar, and other photo keepsakes.
PictureCorrect Comment: The Canon EF 400mm f/2.8 L IS USM Lens is probably the best track/field sports lens available. It is a super telephoto L-series lens with an Image Stabilizer that works great for all different kinds of sports situations.
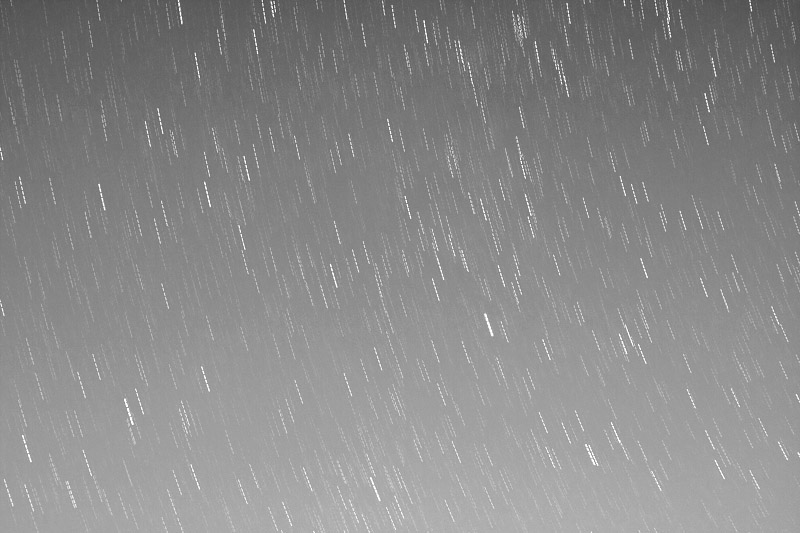
Tips for shooting star trails pictures
Introduction
Star trails photography is at the same time easy and rewarding, it can produce results that will leave most viewers in awe with very little effort.
I will try to cover in this article the basic photography technique and equipment needed for star trails photography.
Get away from the city

It is no secret that one should get away from the city to be able watch the stars, the same holds true for star photography.
Light pollution in the city is just to dense ! Head instead, for some remote camping siteor other unhabitated locations with a clear view for the sky.
Pick a starry night

Yea right ! I know it is obvious but still wanted to pin-point it! Also you might have a better visibility on a moonless night or when the moon is still low on the horizon.
What to Pack?

So let’s take a look at what you should take with you
- Camera: Don’t go without it
- Lens: You will need the fastest lens you have. Well pack 2 one long and one wide. I use a Canon EF 24-70mm f/2.8 (at 24mm) as my wide and an Canon EF 85mm f/1.8 as my long.
- A few memory cards: Star trails is the type of photography when you’d expect to shoot a lot of pictures and keep only a few so make sure to have enough storage with you
- A spare battery: Since we’re going to shoot long exposures you’d better have one or two freshly charged spare batteries with you. Specially that at night temperature goes down and batteries drain faster.
- Remote shutter release:If you don’t have one you can always use your camera’s timer.
- Camera cover: You’d probably need to protect your camera from dew and condensation.
- Tripod: This one should rarely be left behind.
- Flash light: Make sure to include on in you bag, you’ll need it not only to lighten you way.
- Warm clothes & gloves: They might come in handy if it gets too cold.
Camera settings

- ISO Settings: You will need to crack up your ISO settings at at least 800. Although it is very common to use ISO 1600 and 3200 for these shots it is a safe bet to start doing test at ISO 800 and check if there is a need to go higher
- Noise reduction: If your camera has a noise reduction feature make sure to turn it off or else you’ll end up waiting for your camera to finish processing unable to shoot between every 2 pictures.
- White Balance: Knowing that a star is a far away sun then, logically, the correctWhite Balance should be daylight. However this WB setting will generally lead to a very odd sky color, I’ve had much better results using Tungsten white balance.
- Mirror lockup: To minimize camera movements to the max you will want to enable the mirror lockup and, if you don’t have a cable release, enable the timer on your camera.
- Shoot Raw: RAW is much more flexible in editing afterward and specially effective for tweaking white balance settings.
Go wide and include a foreground

It is interesting to include an building/tree/rock or any other object or scene in the foreground. It gives a sense of familiarity to the viewer as seeing a normal scene in an incredible way.
Go long for abstract effect

Another option would be to compose your shot to include only stars. This will lead for a more abstract effect.
Get Creative with light

If you chose to go for a wide angle shot you can also use the flashlight to “light paint” the foreground. This will lead to have a nice foreground with details instead of only a black form.
Taking the shot

- Secure you’re camera on the tripod
- Pick your composition
- Set your Camera to manual exposure and RAW
- Set ISO speed 800, Aperture to the widest possible and shutter speed to 30 second
- Enable mirror lockup
- Don’t forget your white balance
- Put your lens on Manual focus. If you have live view focus in that mode if not simply set your lens to focus at infinity.Be careful most lenses can focus past infinity you have to be sure focus is at infinity.
- Put your remote release to continuous shooting mode, this will lead your camera to take repetitively shots of 30 seconds each keep noise minimal
- If you don’t have a remote release, simply press the shutter button gently every 30 seconds and make sure you have your camera set to 2 seconds timer not 10 seconds
- Keep warm and enjoy your night. Don’t forget to give light painting a try!
Photographing the Micro Landscape
Written by: David Bigwood

Then came the day when I 'needed' to make some pictures - photographers will know what I mean - and the weather was against me. Uniformly grey cloud and lousy light are no recipe for great landscape shots.
With the itch in my shutter finger unsatisfied, I had to find a subject so I began casting around the area and, what do you know, there were dozens of them. Of course there were for those who have eyes to see. The big picture is made up of thousands, maybe millions of smaller pictures and this is what I had been missing.
And, it's not only the weather that can be against the making of the big picture. Sometimes it is hard to avoid the crowds in a popular spot for example but if we are attuned to looking within the scene for its components and are able to recognise potential pictures among them then our frustrations at not being able to make pictures because of situations that are beyond our control can be relieved.
And, when I spent a week last year on England's Cumbrian coast the weather was less than kind but nevertheless I found subjects to shoot between the bursts of sunshine by looking into the landscape.
It was the weather that first forced me into exploring for the smaller pictures but now it is my natural approach to landscape photography. I do not shun the big picture but now I am loath to leave a place until I have made some images that show something of its intimate details. I have learned to not only look but also to see.
And, that is the first step to making pictures of the micro-landscape, the bits that make up the whole. You may have heard the comment by camera club judges, "a well seen picture" and that is what we have to be aware of when considering our photography. We have to look and then, more importantly, we have to see the picture opportunities that present themselves. We have to take our time. We have to immerse ourselves in the area. We need to feel for the place. We need to experience wonder at the age of rock formations and how, over millenniums, they have been fashioned by wind and water; at the way in which trees and other plants survive in less than perfect conditions and how they cling to life and overcome obstacles by growing round and over them. We need to be in awe of the power of nature.
On the coast, there are the rock pools, gouged out by centuries of water action, and their inhabitants, rippled sand, flotsam and jetsam, the plants that bind the sand, the multi-coloured pebbles, and the many wonderful shapes of rock platforms and the strata in cliffs.
Wherever you are, look up. Sometimes a wonderful, and generally fleeting, cloud arrangement will make a great image. And there may be a photogenic arrangement of leaves on a tree or at your feet. Check the trunks of trees, especially after or even during rain when the bark of some trees, especially in Australia, is magnificently coloured. Watch the swirling water in creeks - apart from anything else flowing water is very therapeutic and calming - especially where it ripples over boulders.
As far as technique is concerned, the important thing is to ensure that your subject is sharp and, possibly isolated from the background by using a large aperture. Unless you are using a fast film or ISO setting a tripod will be useful, if not essential, to ensure that your camera stays focused where you want it and that camera shake does not ruin a precious picture.
If you want to make close-up pictures a macro lens or a set of extension tubes will be necessary. I sometimes find focusing when using extension tubes a bit difficult especially when the lens is practically touching the subject. It is sometimes easier then to move the camera backwards and forwards to establish correct focus rather than using the focus adjustment on the camera.
Close-up images of flowers are often better when made under overcast skies as the reduction in contrast suits the subject and enhances the colours. I carry a plastic sheet when expecting to do close-up work at ground level to make the job a little more comfortable.
As the light level on grey days or in woods is sometimes a little low, you may want to use some fill-in flash to enhance your subject. If you can adjust the output of your flash gun, aim to produce a flash about two stops under the exposure setting of your camera which will produce a natural looking image. I have been able to produce quite good results at times with a very basic flash gun by shooting through a couple of layers of a white handkerchief. Not very scientific but it has worked. But, do experiment with your equipment before you leave home!
For the record, I do clear away distracting items, some grass for instance, and I have been known to introduce a greenish leaf from a few centimetres away on to a pile of autumn coloured leaves to provide some contrast. But, if I can, I leave it as I found it. If I do make changes they are only minor. But, it's your picture and your choice.
I have used film and digital to produce my micro-landscape pictures but what you use is immaterial. It is the result that counts and that result will come from your ability to see the picture in the first place and then from your technical know-how which will enable you to make the image.
About the Author
David Bigwood is an Australian based writer and photographer who sells his words and pictures regularly. He was a columnist for F2 Freelance + Digital magazine for three years. His website is http://www.bigwoodpublishing.com where you will find some of his published articles.
PictureCorrect Comment: Many professional macro photographers also carry a ring light which is a special kind of light for extreme close-up photography. The Sony HVL-RLS Macro Ring Light uses bright white LED lighting to provide absolutely true color reproduction. This is ideal when taking macro pictures of flowers, insects and other detailed close ups
Black and White Zones
Written by: Tedric Garrison

We started doing something similar by using wood covered with felt, then using ½ inch nails in place of the holes. Gradually we tried bigger nails like 1 inch and 1.5 inch in size. We found that by creating more depth physically, it also created more visual depth.
Most "String Art" Kits only used the ½ inch nails and would only do five or six rows of thread. By adding more depth in the physical dimensions (the nails), we were able to create images with ten to twelve rows of colored thread. Eventually; I designed a coffee table that stood, three feet tall with inlayed glass. This creation was twenty four layers deep.
My immediate response was this: "Those who learned B/W photography first, were taught more art concepts. A great photo has to do more with leading lines, composition, and contrast than a single color theme. Most B/W photographers learn to capture the full range from black to white (the Zone System), most people who only see color rarely create as much visual depth."
In pondering my reply; I realized that there is very likely a whole generation of photographers out there who have either: A) Never heard of the Zone System or B) May have heard of it, but don't understand how it applies to images today. Let me see if I can simplify this.
If you listed the ten greatest photographers of all time, Ansel Adams would no doubt be on that list. He and another man by the name of Fred Archer developed the Zone System way back in 1941. Realizing the limitations of the media, they were striving for a way to create more visual depth. "Expose for the shadows and develop for the highlights," was the phrase that many photographers used to explain what they were doing when they used the Zone System.
Imagine a set of stairs. The bottom step represents pure black (Zone 0). The top step represents pure white (Zone 9). The step in the middle (Zone 5) represents the 18% gray that all cameras (traditional or digital) believe to be the correct exposure. From the mid-point (Zone 5), each step or zone (up or down) represents a change of one f-stop. Therefore, Zone 4 requires an exposure of one f-stop less than your camera indicates. And of course, Zone 6 requires an exposure of one f-stop more than your camera indicates.
In a normal shooting mode, if you use exposure compensation to take the image at Zone 4 you will darken the entire image. But since RAW mode saves all the exposure data (both shadows and highlights) it would be similar the second part of the Zone System.
Let's say you want to photograph an interesting rock formation with a blue sky and fluffy white clouds. The rock formation is shadowed but has lots of interesting textures. You want to bring out as much detail in that rock formation as possible. You meter the shadow areas of the rock, which indicates a shutter speed of 1/60 with an f-stop of f/2.8. Then, you meter the sky, which indicates the same shutter speed but with an f-stop of f/16. Keep in mind that in high contrast scenes, you MUST expose for the shadows if you want to show those details. You decide the shadows fall within Zone 2, (very dark, but not a true black.) By using your Exposure Compensation Settings, you would stop down three stops and shoot at 1/60 at f/8. In other words: Zone 5 - Zone 2 = 3 stops less light.
When I was young, I learned to go beyond the basics by creating more depth. Creating depth by physically changing the rules is one thing; but when you deal with a photograph, paper is still paper. To get more depth in a photograph you have to increase the visual range beyond what most cameras want to give you. Regardless; if you shoot with film, or you shoot digital . . . the best way to achieve more depth is still the Zone System.
This Article Written By: Tedric A. Garrison Cedar City, Utah
Award winning writer / photographer Tedric Garrison has 30 years experience in photography. As a Graphic Art Major, he has a unique perspective. His photo eBook "Your Creative Edge" proves creativity can be taught. Today, he shares his wealth of knowledge with the world, at: http://www.betterphototips.com.
PictureCorrect Comment: There are many methods of converting regular digital photos into black and white photos. Most professionals develop some sort of style in Photoshop with various adjustment layers and tools. CS3 now offers productivity and work flow enhancements for processing many photos.
3 ways to create a border

Method 1
1) Open a picture in Photoshop
2) Go to Image » Canvas Size (Ctrl+Alt+C)

3) Check Relative

4) Enter a value for width and height. Leave the Anchor with default settings. Go to Canvas Extension Background and choose a color for your border. Click ok.
5) You are done.

Method 2
1) Open a picture in Photoshop
2) Select Rectangle Tool (U) and draw a rectangle of any dimentions.

3) Go to Edit » Free Transform Path (Ctrl+T) and stretch the rectangle until the margins snap with the picture margins.

4) With the layer selected, right click » Bleending Options
In Fill Opacity, set Fill Opacity 0%.

5) Click Stroke. Choose a color for your border and also the size in pixels. Set Position »Inside. Click OK

6) You are done.
Method 3
1) Set your background color in the Tools Palette to black (for a black border)
2) Choose the Crop tool (C) and draw a rectangle of any dimentions.
3) Stretch the rectangle until the margins snap with the picture margins.
4) Hold down SHIFT+ATL to constrain proportions, and drag one of the corners, until you have the right size.
5) Press Enter and you are done
Create a Panorama
Creating a panorama it’s really easy. First you have to start using your digital camera and take a few shots. Lets assume that the image above is what you see.

First of all let me show you the wrong way to take the shots.

And the correct way is:

The reason why photos should intersect is that Photoshop can find the edges more precisely and blend them together correctly. Ok, so far so good. The next step is to load all photos into Photoshop. Go to File » Automate » Photomerge

Click Browse , search for your photos and load them. There are several options on the Layout section. For best fit set Auto. Click OK and let Photoshop do the trick. Wait a few moments and this is what you should get.

It’s time to make a few adjustments. You can clone edges for a more uniform photo. Use Clone Stamp Tool (S)

And then Crop (C) to fit:

Final result is:


Other adjustments: Levels, Hue/Saturation, Curves, etc.
MAKE PANNING SHOTS LIKE A PRO
Advanced level tutorial - added on January 9. 2009
Much has been written about how to make the best panning photos of a car, and you could spend hours just reading about it, but what it all comes down to in the end is experience … and a few basic settings.
Canon EOS40D - Canon EF70-200mm f/2.8 L IS USM - 200mm 1/250 f4.0 ISO320" style="color: rgb(0, 0, 0); text-decoration: underline; font-style: italic; ">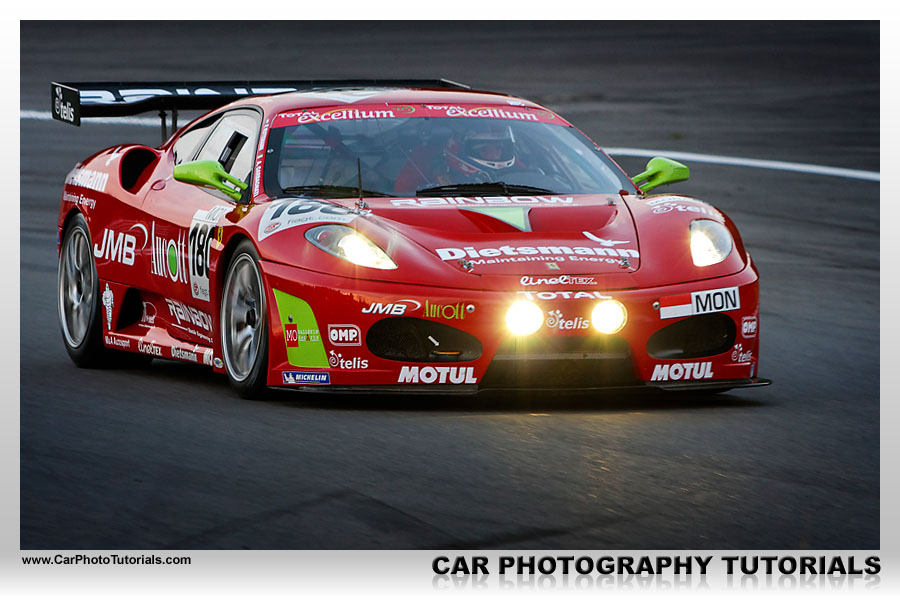
Canon EOS40D - Canon EF70-200mm f/2.8 L IS USM - 70mm 1/250 f10.0 ISO320" style="color: rgb(0, 0, 0); text-decoration: underline; font-style: italic; ">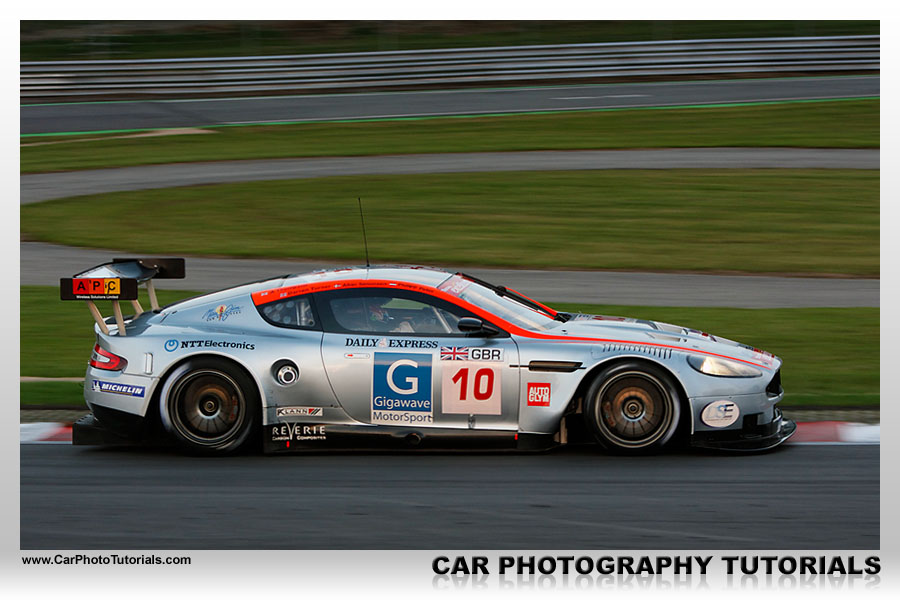
On a regular basis people ask me what settings I use when I’m track side shooting Formula One, FIA GT or any other kind of high speed car racing series, and as I am a nice guy I give them my setting for shutter speed, aperture and ISO … but that is only a small part of the panning technique.
Canon EOS40D - Canon EF70-200mm f/2.8 L IS USM - 200mm 1/320 f10.0 ISO100" style="color: rgb(0, 0, 0); text-decoration: underline; font-style: italic; ">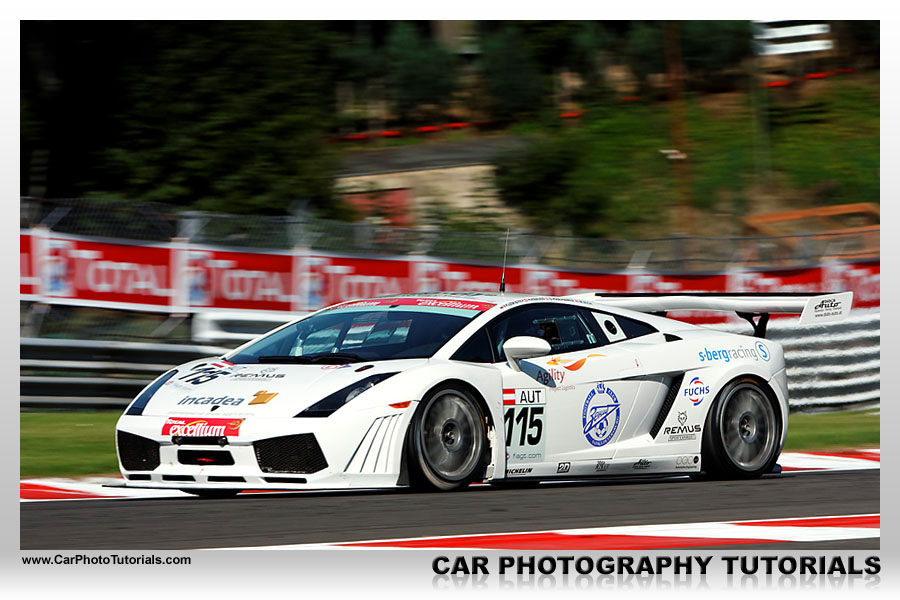
One point of caution however, races are dangerous places, especially standing along the track when these cars go by at enormous speeds, always stay alert to anything that can happen, from debris flying around to a Saleen hitting the tire wall at full speed just inches away from where you are standing (been there, it’s no fun belief me), so be careful, no photo is worth your life, remember that!
Settings
Canon EOS40D - Canon EF70-200mm f/2.8 L IS USM + Canon EF 1.4 extender - 280mm 1/250 f7.1 ISO100" style="color: rgb(0, 0, 0); text-decoration: underline; font-style: italic; ">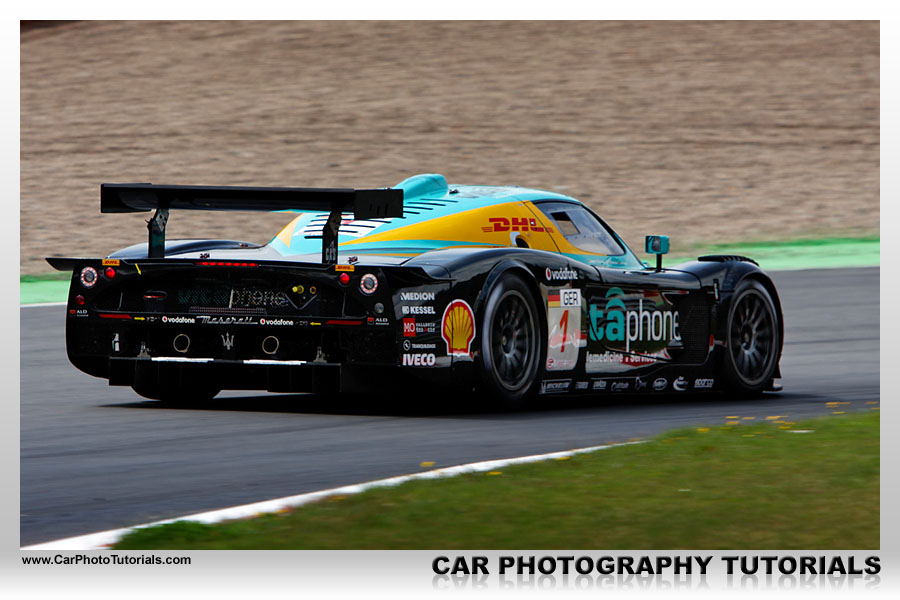
Canon EOS40D - Canon EF70-200mm f/2.8 L IS USM + Canon EF 1.4 extender - 98mm 1/320 f4.5 ISO160" style="color: rgb(0, 0, 0); text-decoration: underline; font-style: italic; ">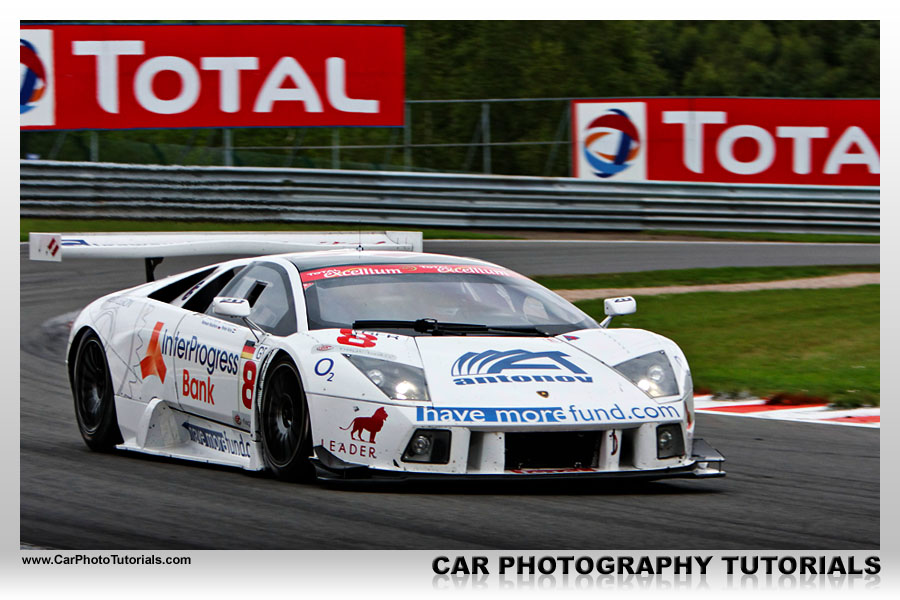
The trick is to set your camera as mentioned before in Shutter priority AE and take a metering on the track in front of you, remember the aperture value the camera is giving you, now put the shutter speed, aperture and ISO setting in manual identical to the metering you've just done in Shutter Speed priority.
Holding your camera
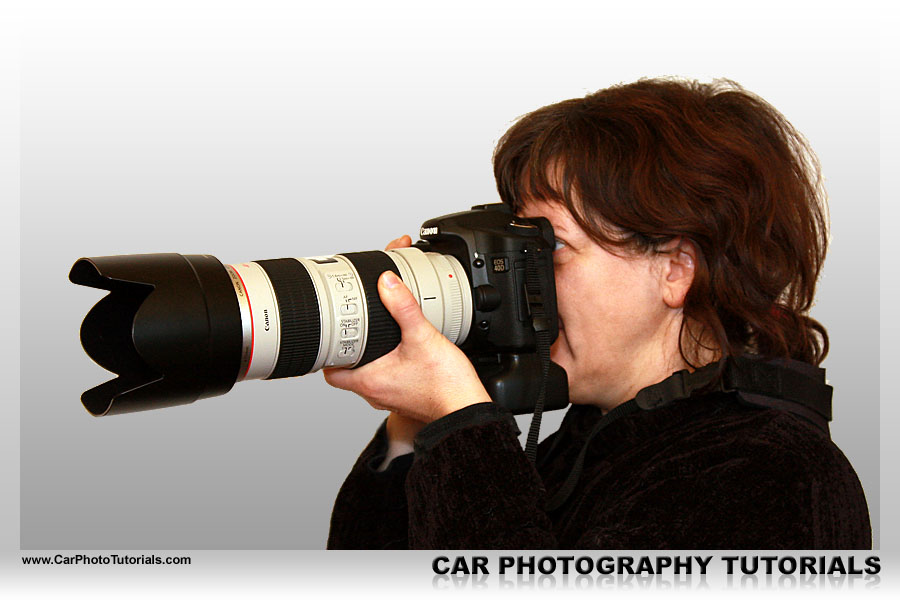
Panning cars is a technique to keep your camera as smooth and horizontal as possible while 'swinging' it from one side to the other using your upper torso, don't just swing your head with the camera, but instead swing your shoulders and upper torso at the hips together with the camera. Both your arms and your eye actually form a kind of tripod in this case if you hold it right.
Make sure your stance is firmly on solid ground, you don't want to slip away while panning (be careful on gravel or mud), both feet should be pointing in the direction where you want your shot to be taken, not in the direction from where the car is approaching, you swing yourself towards that direction and wait for the car to arrive. Some people will put their left foot a little further forward when swinging from left to right, try whichever position works best for you.
Use a monopod?
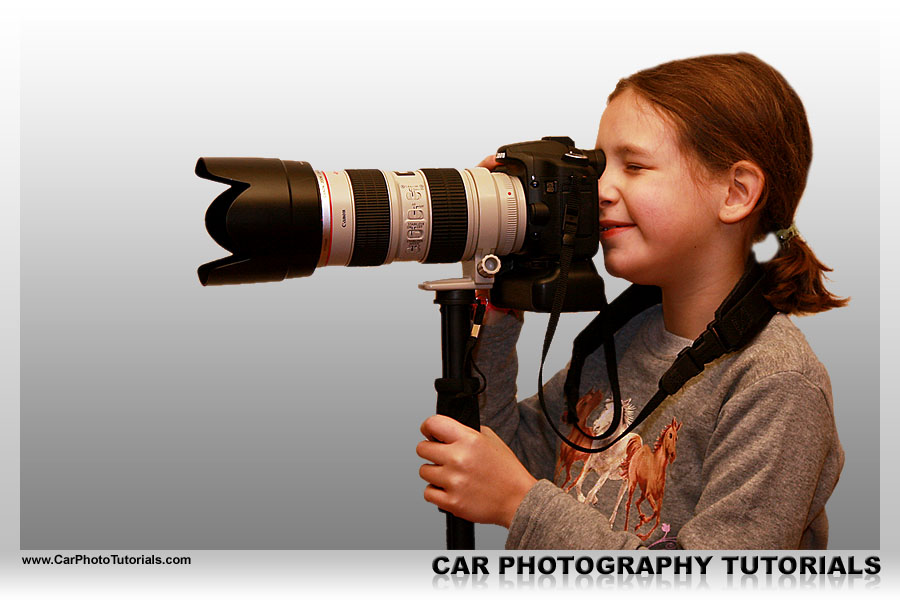
Some people will try to convince you that an IS (or VR or OS whichever make you prefer) is of no use when shooting sports, but I strongly disagree with them, most modern stabilized lenses offer a setting like ‘mode 2’ on my Canon that works nicely when you can do a horizontal panning shot on a car (haven’t done any vertical ones actually …) so the extra cost is worth it in my opinion. And putting it into mode 1 to counteract both horizontal and vertical movement is just perfect when taking pictures of the kids, a nice extra bonus to convince your wife (or husband) when you are spending big money on this hobby.
I would use a monopod for taking head on shots, you have positioned yourself with a nice view of the cars coming towards you, if you have enough range you can take stunning head on shots this way, and a stable monopod could safe the day in this case, but for regular panning shots it is of little use I think.
What’s a hit rate?
Canon EOS40D - Canon EF70-200mm f/2.8 L IS USM + Canon EF 1.4 extender - 280mm 1/320 f8.0 ISO100" style="color: rgb(0, 0, 0); text-decoration: underline; font-style: italic; ">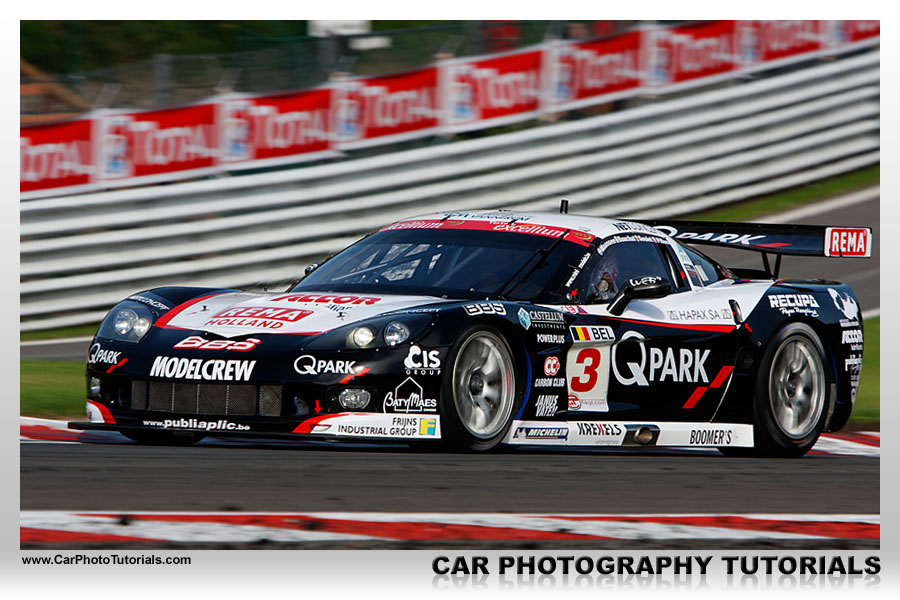
If you are working on an assignment you would be taking your first shots at a faster shutter speed, say 1/640 or something like that, just to make sure you come home with sharp photographs that can be published, after that you can continue shooting at 1/250 and 1/125 to get some more motion in the shots, but avoid not having any decent shots to deliver to the people paying you in the end.
An actual panning shot
Canon EOS40D - Canon EF24-105mm f/4.0 L IS USM - 32mm 1/125 f10.0 ISO100" style="color: rgb(0, 0, 0); text-decoration: underline; font-style: italic; ">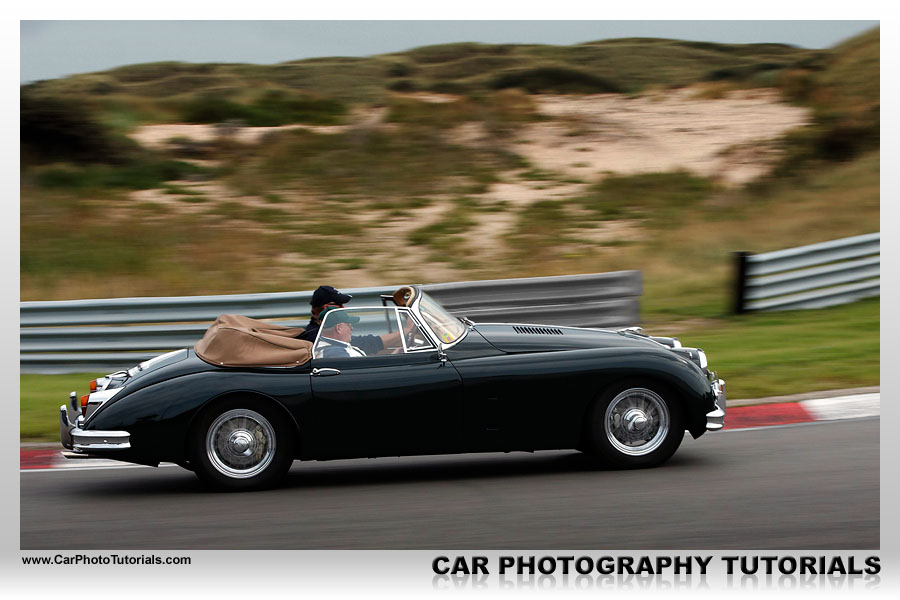
The better you master to swing your camera at the same speed as the car, the better your shots will look, and keeping the camera horizontal is a key element here, which is why I prefer a stabilized lens for this kind of work.
Canon EOS40D - Canon EF70-200mm f/2.8 L IS USM - 200mm 1/200 f8.0 ISO100" style="color: rgb(0, 0, 0); text-decoration: underline; font-style: italic; ">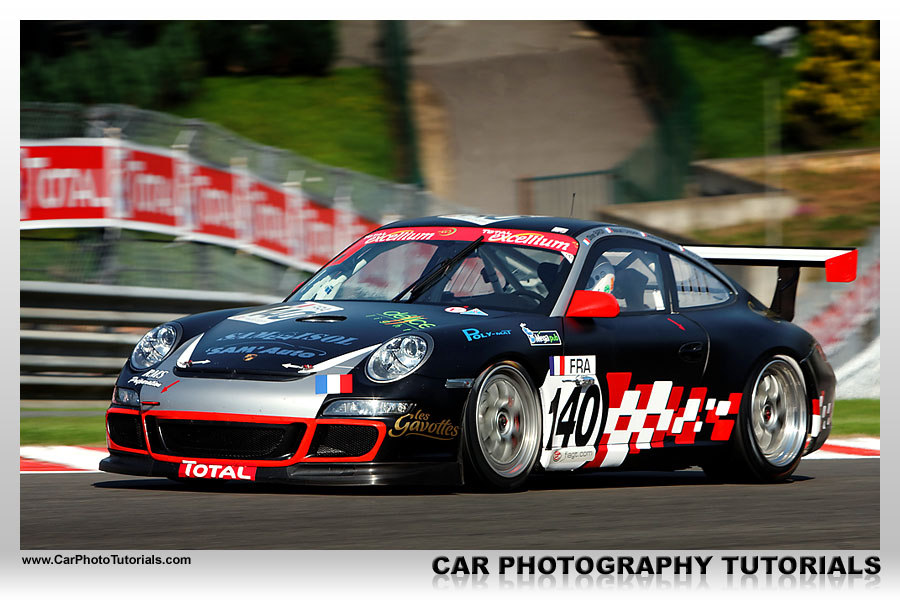
Your swing and press on the shutter release will become one smooth action over time, that's when you will be able to take tack sharp panning shots at low shutter speeds, a good panning shot will have five sections :
1. Get the car in the frame as it approaches
2. Start following the car, keeping it in position inside your viewfinder
3. Press the shutter half way to focus on the car, keep 'tracking' it
4. When the car is in the position directly in front of you, take the shot by gently pressing the shutter release, don't stop following the car !
5. Finish your swing by following the car as it disappears in the distance.
Canon EOS40D - Canon EF70-200mm f/2.8 L IS USM + Canon EF 1.4 extender - 280mm 1/250 f8.0 ISO100" style="color: rgb(0, 0, 0); text-decoration: underline; font-style: italic; ">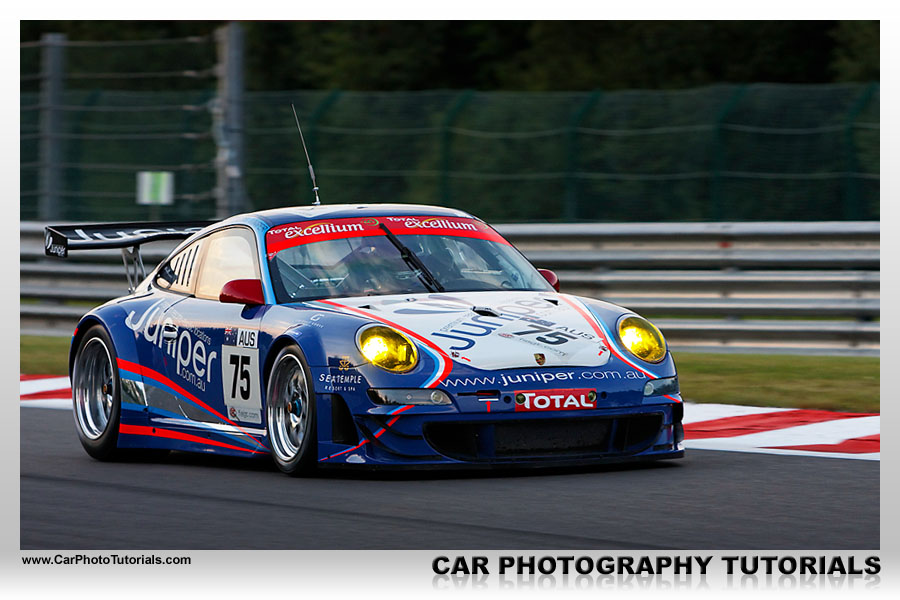
Some will try to convince you that you shouldn't use Auto Focus in panning but instead focus manually on the track in front of you and wait for the car to reach that point ... this method does work (manual focus has been done for years). However if you have a decent telephoto lens it will be able to maintain Auto Focus on the car as it speeds by, that is one of the reasons why this is an Advanced tutorial, as it requires you to get a high end telephoto lens, something like the Canon EF70-200 f/2.8 L IS USM or the Nikkor AF-S 70-200mm f/2.8 G IF-ED VR (you could go for their non-stabilized counterparts to save some money) but keep in mind both these top of the line lenses will set you back a lot of cash.
A little trick
Most DSLR these days have a nice fps figure, that’s the number of photos your specific model is able to make within one second, some do 3 fps while the top of the line models like the Canon EOS1D III will do as many as 10 fps … that’s almost a machine gun. The Canon EOS40D I’m using will do 6.5 fps, which isn’t too bad.
Canon EOS40D - Canon EF70-200mm f/2.8 L IS USM + Canon EF 1.4 extender - 98mm 1/200 f10.0 ISO200" style="color: rgb(0, 0, 0); text-decoration: underline; font-style: italic; ">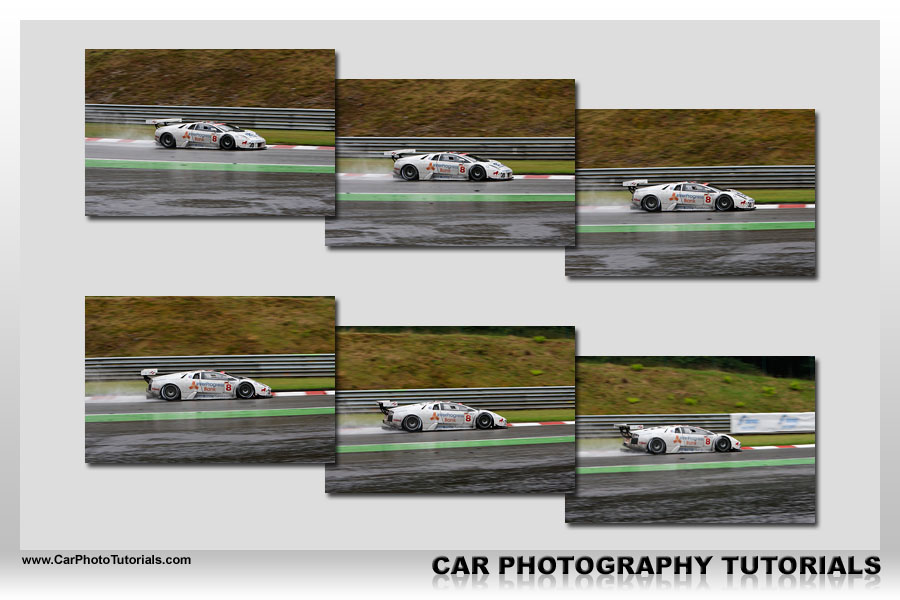
Now comes the tricky part, the camera has filled his buffer with multiple shots and now needs time to write these to your memory card (CF’s in my case) … do NOT switch the camera off now ! This will erase your photos before they have had the chance to be written to the card, wait until the writing light goes out, then you can shut down if you want to.
Canon EOS40D - Canon EF70-200mm f/2.8 L IS USM + Canon EF 1.4 extender - 98mm 1/200 f10.0 ISO200" style="color: rgb(0, 0, 0); text-decoration: underline; font-style: italic; ">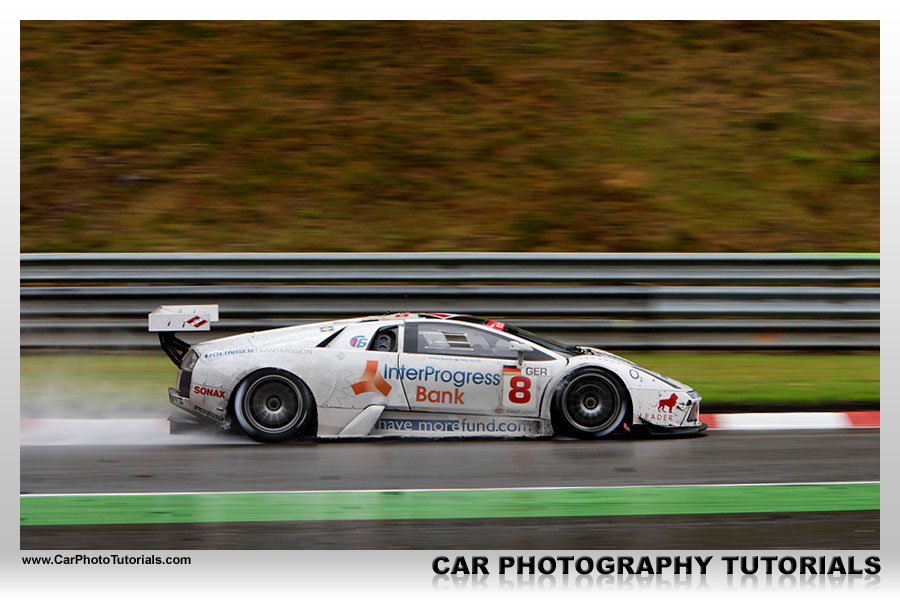
This ‘burst’ technique should help you out in the beginning, you will be able to get a hit rate up to 50% right from the start this way, especially at 1/320. However later on you will master the panning technique and can rely on taking a single shot as the car comes by, being relatively sure that you’ll end up with a nice, sharp panning shot.
I still revert to the burst method during events, when you will only see a specific car coming by two or three times, so you don’t have a lot of opportunities to get it right, taking about ten shots per round will put you safe, you will end up with several usable shots. During a race, be it a one hour stint or a 24 hours race, you have plenty of rounds to shoot your photos, so I don’t use the burst method on those, you will be seeing the same car passing by countless times anyway.
A great panning shot
Canon EOS40D - Canon EF70-200mm f/2.8 L IS USM + Canon EF 1.4 extender - 125mm 1/200 f4.0 ISO200" style="color: rgb(0, 0, 0); text-decoration: underline; font-style: italic; ">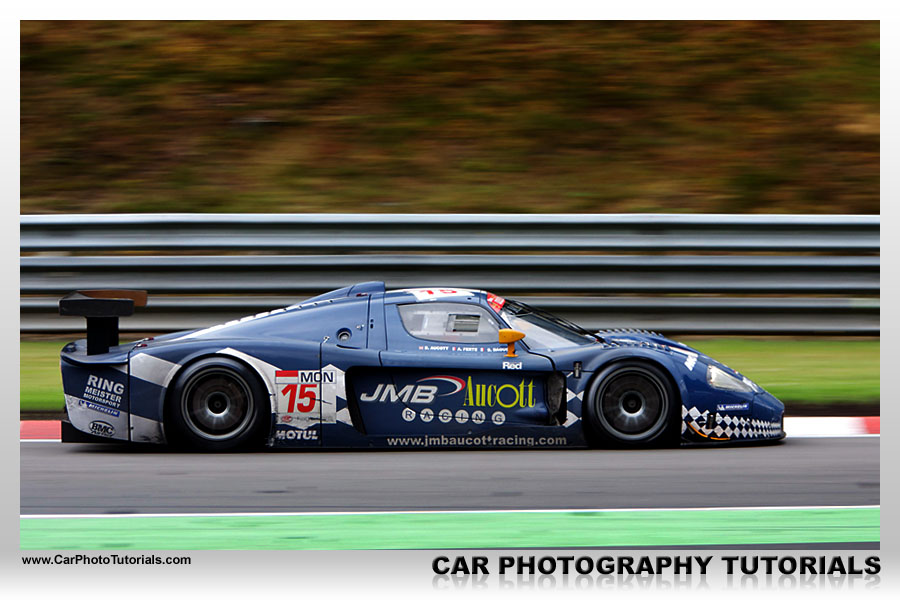
Canon EOS350D - Canon EF70-200mm f/2.8 L IS USM - 95mm 1/400 f2.8 ISO100" style="color: rgb(0, 0, 0); text-decoration: underline; font-style: italic; ">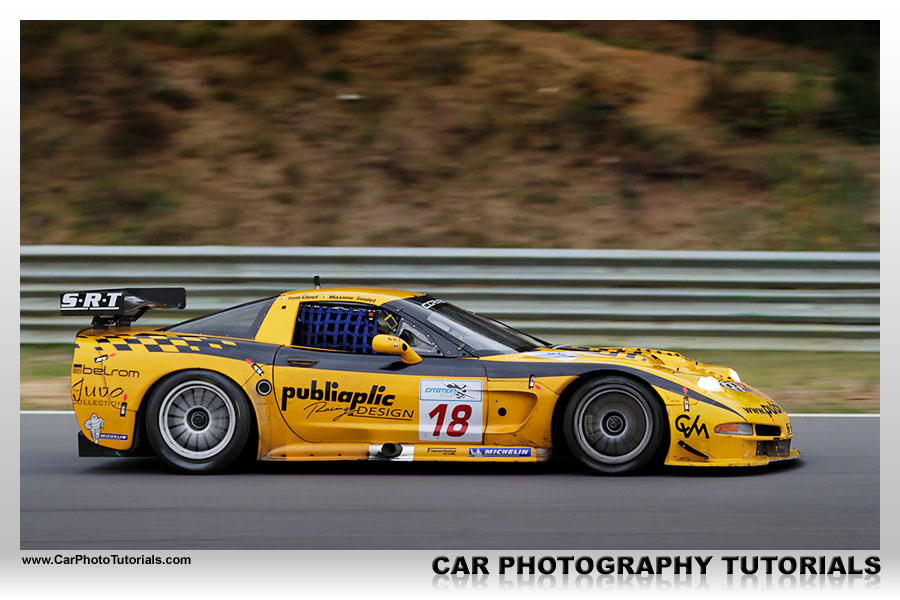
Select your position carefully
Canon EOS40D - Canon EF70-200mm f/2.8 L IS USM + Canon EF 1.4 extender - 135mm 1/250 f5.0 ISO400" style="color: rgb(0, 0, 0); text-decoration: underline; font-style: italic; ">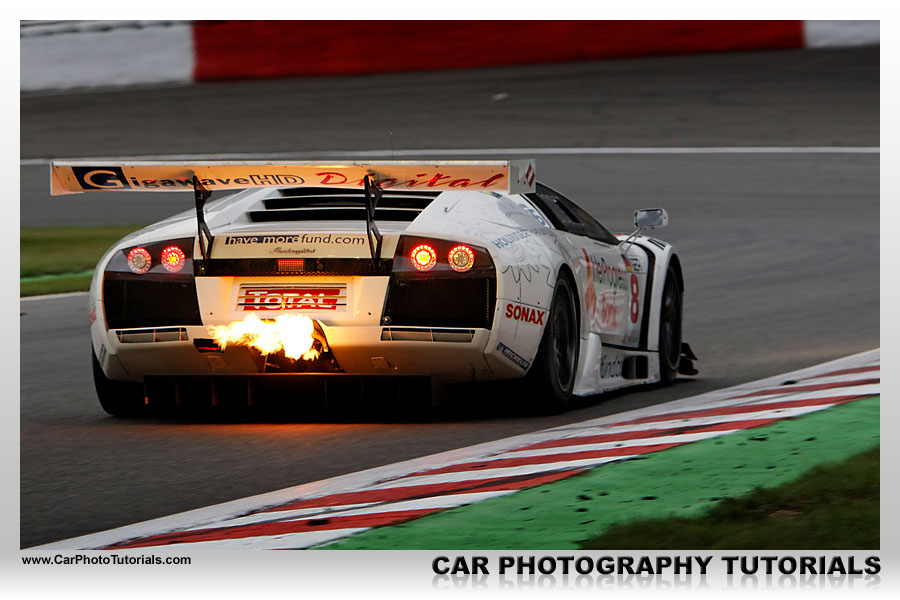
While you are photographing a race always ‘listen’ carefully, the tires will make a lot of noise when they loose grip, so you can hear it spinning before it will hit something, also the gravel pits around the track will normally slow it down considerably before it actually reaches you, but still be extremely alert during a race, that’s my only advice if you are working alone.
f you would like to print the Panning shots like a pro tutorial you can download our special PDF which is optimized for hardcopy layout.
Subscribe to:
Posts (Atom)