30 April 2009

"Whitening Teeth & Eyes"

(Pages 54, 55 from the Retouching Portraits section of Photoshop Retouching Cookbook for Digital Photographers - courtesy of O'Reilly Media.)
Retouching Portraits - How To Whiten Teeth & EyesWhenever the need arises to make a natural element white or whiter, it's tempting to set the foreground color to white and reach for the airbrush. This works if applied with care, but it's easier to achieve a more realistic effect using other Photoshop tools. Here, a small amount of whitening applied to the model's teeth and eyes will lift the whole image.

Method 1: Dodge
The first technique successfully whitens your teeth without placing demands on your brushwork. As with most retouching tasks, it's best to work on a duplicate layer in case you make a mistake.

STEP 1
Create the new layer, select the Dodge tool, then go to the Tool Options bar and set the Range to Midtones. The default Exposure setting is 50%, which is a good starting point. Now run the Dodge tool over the teeth until they look whiter. The Dodge tool is very powerful, so more than three brush strokes could leave the teeth looking overdone. If that's the case, use Undo (Ctrl/Cmd +Z) to step back, then reduce the Exposure setting in the Tool Options before returning to work.

Retouching Portraits - How To Whiten Teeth & Eyes

STEP 2
Work over the eyes in the same way, zooming out often to get a look at the image as a whole. The close-up view can often be misleading.

Retouching Portraits - How To Whiten Teeth & Eyes

Retouching Portraits - How To Whiten Teeth & Eyes

Retouching Portraits - How To Whiten Teeth & Eyes

Method 2: Screen mode
If you're not comfortable with applying brush strokes for whitening, there are other options. In this technique, all you need to do by hand is to make a selection around the areas to be retouched. This technique works equally well with teeth or the whites of eyes.

STEP 1
Press Ctrl/Cmd + J to copy and paste the selection to a new layer, called "teeth." Change the new teeth layer's blend mode to Screen.

Retouching Portraits - How To Whiten Teeth & Eyes

Retouching Portraits - How To Whiten Teeth & Eyes

STEP 2
This effect is too strong in itself, but by reducing the layer's opacity you have complete control over the degree of whitening. The next example shows the layer opacity set to 60%.

Retouching Portraits - How To Whiten Teeth & Eyes

Method 3: Curves
We can also use Curves to brighten the teeth and change their color. This method is particularly useful if you want to fine-tune the effect in more detail. 

Retouching Portraits - How To Whiten Teeth & Eyes

STEP 1
Make another selection of the teeth, then choose Image > Adjustments > Curves(Ctrl/Cmd + M). We need a white adjustment, so keep the Channel set to RGB and drag the top right corner of the diagonal line to the left as shown.

Retouching Portraits - How To Whiten Teeth & Eyes

STEP 2
You'll notice that this results in a slight yellowing of the teeth. Blue is the complement of yellow, so pick the Blue channel from the Channel drop-down, then create the curve as shown. To copy mine exactly, click on the top endpoint of the curve, then type 234 in the Input number field. (For a full explanation on using Levels and Curves to control color, see pages 26-27.) The final image shows the same settings applied to the whites of the eyes.

Retouching Portraits - How To Whiten Teeth & Eyes

Retouching Portraits - How To Whiten Teeth & Eyes

Copyright © 2005 The llex Press Limited - All rights reserved. No part of this book may be reproduced in any form, by photostat, microfilm, xerography, or any other means, or incorporated into any information retrieval system, either electronic or mechanical, without the written permission of the copyright owner.

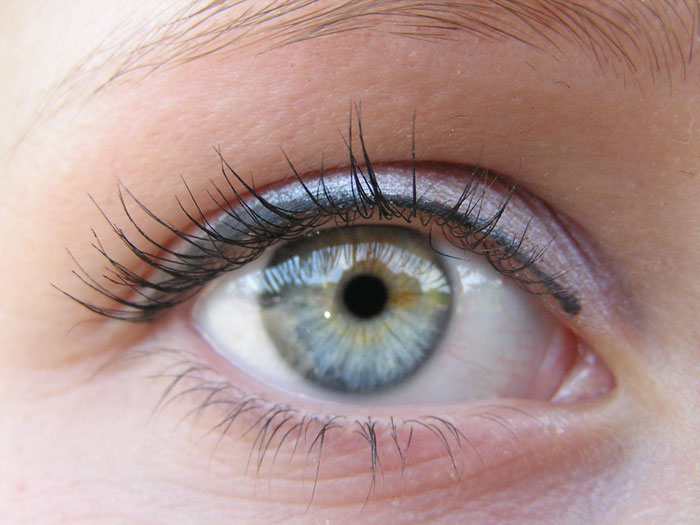
Make eyelashes thicker

Transform this photo:
Digital photo news -massive eye correction

Into this one:
Digital photo news -massive eye correction


Step 1
Open our photo (you can download it from here)

Step 2
We will have to different layers for upper and lower eyelash because they are dissimilar and we are going to use two different methods for each of them. So make new layer (CTRL + N) and name it "upper". Go and pick Pen Tool (P on the keyboard). Use settings as in the picture below.
Digital photo news -massive eye correction
Now zoom in (you can use CTRL + + combination) on the upper eyelash and start drawing with pen tool. Our goal is to make our path as more similar to actual shape of eyelash as possible (don't be afraid, little practice and you'll see that this is not so hard at all). I always make 3 point when working on upper eyelash, because it is easier to adjust curves that way. 
You make eyelashes mainly on places where actual eyelashes are thiner or where empty spaces between them exist. One more thing to remember and that is that eyelashes are not all the same thickness and color so be sure to change colors and brush size, but you'll see in next steps how I did that.
After making first eyelash shape with pen tool (I got it something like this) 
Digital photo news -massive eye correction
click on Brush Tool and select size of brush and color. I choose size to be 2px and color something like #1e201b (you can use Picker Tool and choose your own selection of color). Now go to the Path palette, click Options, 
Digital photo news -massive eye correction
then go to Stroke path 
Digital photo news -massive eye correction
and select Brush tool and check Simulate pressure.
Digital photo news -massive eye correction
Click OK. Then repeat these steps and don't forget to change brush size (little steps) and color of brush.

Step 3
For now we have finished with upper eyelash and now is the time to go to lower eyelash. Make new layer and call it "lower". We will do almost the same procedure as on the upper eyelash. Only difference is the path shape. In previous step I used a 3 point path style but in this step I'll be using only 2 points to make an eyelash path, just like this one below.
Digital photo news -massive eye correction
HINT: You don't have to draw path for every eyelash. Use Direct Selection Tool (A), select any point on the path and then just drag that point where you want new eyelash!
Now, stroke as many eyelashes as you want.

Step 4
Because we stroke every eyelash with Brush tool we want to smooth a little bit edges of drawn eyelashes. So, click on "upper" layer and go to FILTER - BLUR - GAUSSIAN BLUR and set values as I did.
Digital photo news -massive eye correction
If you want you can use Blur Tool to blur just a little bit more those eyelashes to the left and right. Repeat same procedure for "lower" layer also. And for the final touch set Blending Mode for both layers to be Multiply. This will bring more black color to photo.

Step 5
This one is optional. If you want to remove those reflections in the eye use Healing Brush Tool (J) and gently remove those reflections in the eye. We had to do this in this photo but in yours it might not be the case.

Digital photo news -massive eye correction

See you!

author of this tutorial is Vladimir Markovic